Thursday, 8 March 2012
Ivar sideboard (or "hidealottastuff")
Materials: Ivar cabinets (two, 80x30x83 cm), Ivar side/upright unit (one, 30x226 cm), shellac, paint, varnish, wood glue, screws. Optional: Rationell Door Damper (4)
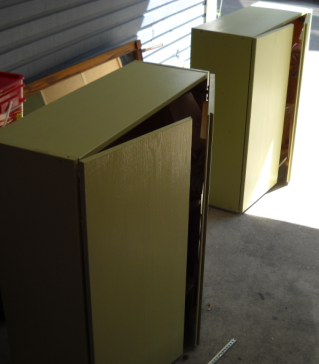
Description: I had some Ivar cabinets and some Ivar shelving in my living room. But I wanted a more "grown-up" look. My friend/colour consultant/interior designer suggested I needed more closed storage in the living room and wondered if something could be done with the cabinets (they had already been painted for a previous incarnation). And this is where that idea went. I still love it, 3 years later.
1. Paint and varnish the cabinets. It looks and feels nicer if you sand it all first. You should probably shellac to seal the knots before you paint unless your paint is very dark, because the knots will discolour and show through your paint over time, especially with sun exposure. I had already painted them so they matched my pale green Robin bookshelf (found in the as-is section around 1998 and I still love it). I only painted the outsides of the top, sides and doors. I had used 2 coats of paint and then I added 3 coats of varnish.
2. Make the plinth out of the side/upright unit. The main part of the plinth will be the same length as the two cabinets side-by-side. Cut it so that the cross-pieces of the side/upright unit are at least 10 cm in from the end. I did a lot of turning and looking and turning again to decide which edge was the most attractive, and made that the front edge.
3. With the remaining pieces of the side/upright unit, cut two pairs of legs - I cut it so that each pair of legs were held together by one of the cross pieces of the side/upright unit. I made the legs 13.5 cm tall. Again, I turned and looked and turned again to decide which was the more attractive side of each leg, and made that side the front. I have baseboards around my walls, so I trimmed what would be the back legs by 1 cm to allow for the baseboards, so the cabinets will sit right against the wall. I also cut one piece for each end of the plinth, and just attached those pieces with glue. Then the plinth becomes a full rectangle, rather than parallel lines connected by cross pieces.
4. Sand the plinth and legs and varnish them. I did 3 coats and sanded lightly between coats. I even used small bits of the side/upright unit to make little sanding blocks.
5. Attach the legs to the underside of the plinth, using glue and 7.5 cm screws. Place them so the proportions please you, but make sure each leg's center is lined up in between the shelf pin holes, so the screw is not going through those holes.
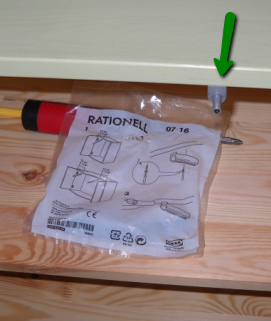
6. Attach the cabinets to the plinth. I lined it up so the fronts of the doors were just slightly protruding beyond the edge of the plinth. This means the top of the front of the plinth shows when the door is open (red arrow in that picture.) I put 3 screws through the bottom of each cabinet at the back into the back side of the plinth (green arrow). I didn't screw the front edge because they were lined up such that there wasn't really enough overlap. (Though you could use tiny metal L-brackets on the underside.) And I should have screwed the two cabinets together through their sides, but because I wanted to be able to take this apart one day if it no longer fit my needs in this configuration, I didn't. It holds together ok, I just have to be careful when moving it around.
7. Finishing touch: Add door dampers so the doors close a little more quietly. I found these ones in a clearance bin - the newer Rationell door dampers probably work better!
~ Lori H., Vancouver
Subscribe to:
Post Comments (Atom)


No comments:
Post a Comment