Showing posts with label Numerar. Show all posts

Friday, 26 April 2013

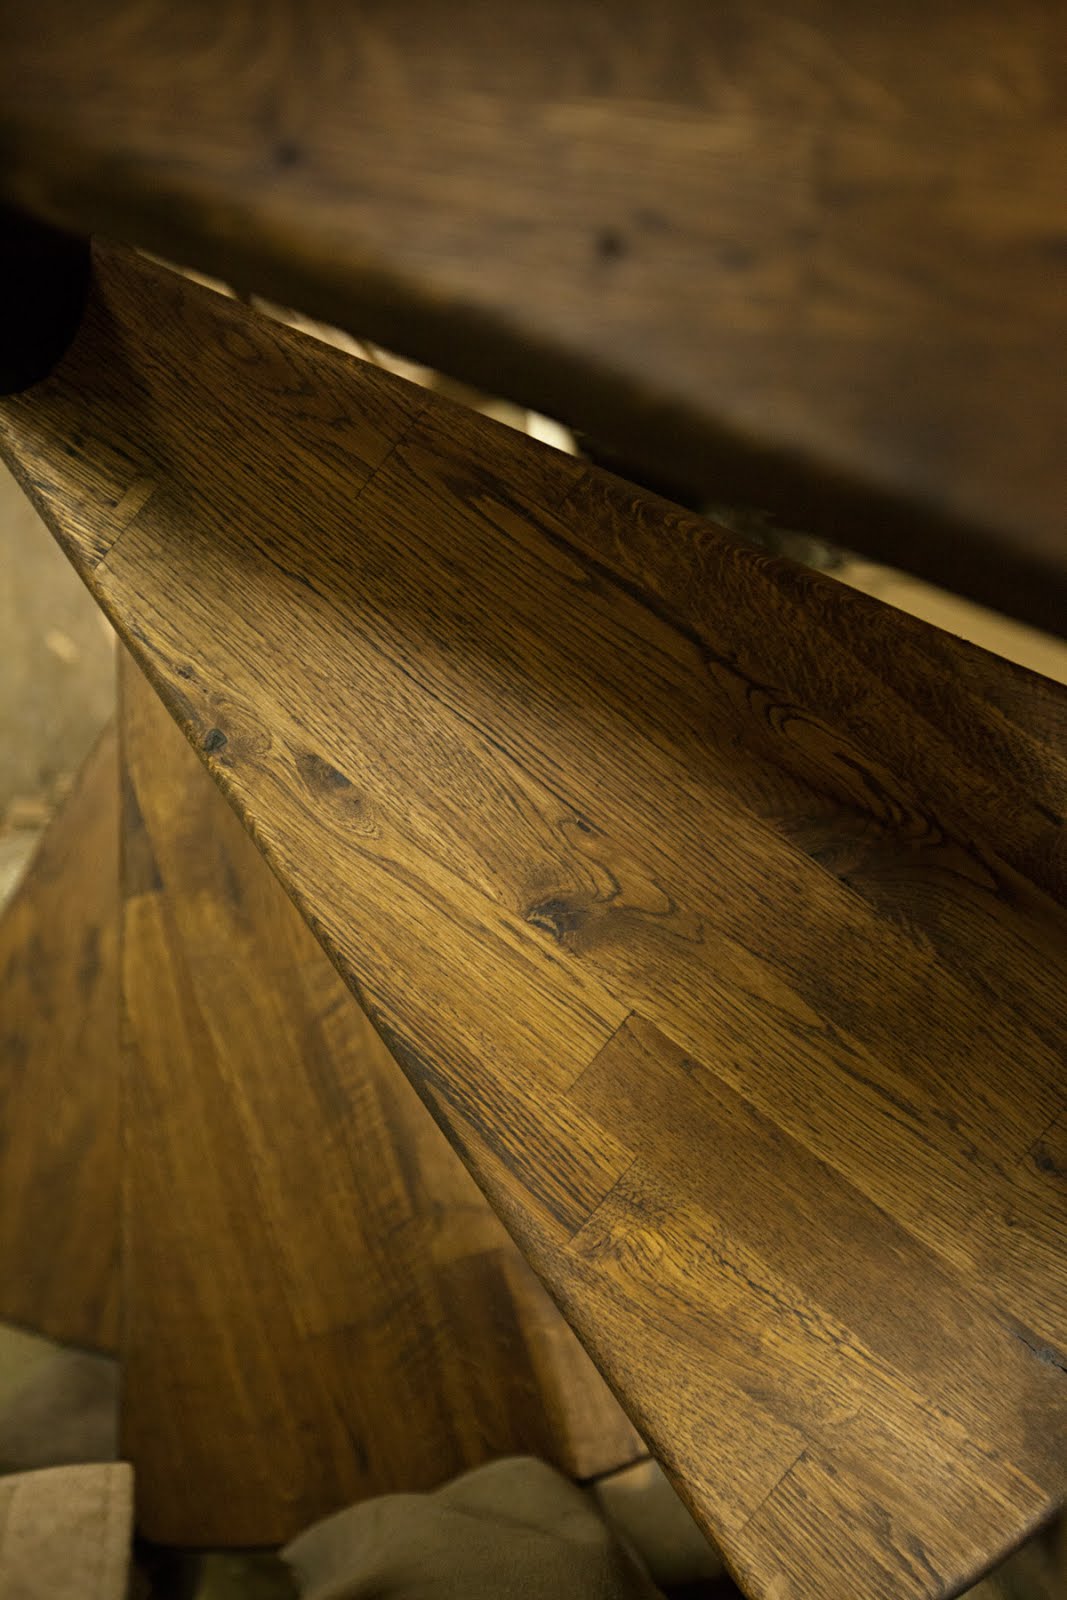
Spiral Staircase with Numerar


Materials: NUMERÄR Countertop Oak

Description: After searching for spiral staircases and not finding anything that would work for my situation I decided to try and create my own. I stumbled upon the countertop at Ikea and Knew they would look great as the treads and they are decently cheap as well. I have about $200 in steel and $160 for the countertop in the staircase that would have cost upwards of $1k

I went with a 4" steel pipe from the local steel yard buying 18'. Also purchased some angle and flat steel to frame out the stairs. My treads needed to be 22" long making the whole staircase 4' including the center pipe. The treads are 30 degrees, so you can fit 6 on one side or 180 degrees together. I had a total of 7 treads or runs and about a 9" rise. Take the overall height and divide by the runs = the rise needed. Once all this was welded back supports aren't needed and the stairs are very rigid.


For the treads I headed to Ikea and picked up the 8' NUMERÄR Countertop in Oak, traced and pattern and laid out the cuts in pencil with the grain all going the same direction. I cut the straight lines with the skilsaw and round cuts with the bandsaw. Took the router to the edges and followed up with some sanding and stain. Attached the treads with lags and wiped everything down.

It really turned out better than I thought and for a fraction of the price + you get to tell people you made it.

Two videos of the process
Woodwork here
 

and Steelwork here.

Really don't be afraid to take on the large projects and trust in yourself to finish them.

~ Bryce Phelps

Friday, 8 March 2013

Kitchen cart and butcher block transform into bench


Photo: IKEA.com
Materials: Bekvam Kitchen cart, Numerar Butcherblock

Description: We scored the butcher block in the As Is section and my husband had the instant idea to finally make a window bench for our daughters room.

We also ran into the Kitchen Cart which was heavily reduced.

Here's how it worked:

The kitchen cart legs where shortened to the desired height, put together (without the top and the shelves) and just cut in half to create 2 leg sections.

Each half was used on either side of the custom cut wood top (butcher block) and attached with the hardware included with the kitchen cart.


Nothing was added to it besides one piece of maple board to finish of the front. Just two quick router cuts and the hardware from the kitchen cart fitted perfectly.


It fits like a glove and we had lots of fun reading, playing and relaxing on it already.

We've also created custom drapes using existing Ikea curtains and added their fun fabric as well as throw cushion and floor pillow.

~ Neat & Simplified, Canada

Thursday, 13 December 2012

MALM meets NUMERAR Kitchen Island


Materials: MALM, NUMERAR, AKURUM

Description: My wife and I recently bought our first house. Yay! As you can imagine, living in L.A. means housing is very expensive, and we didn't have very much left in our budget to renovate the new house as much as we would have liked to.

One of the things we knew we wanted to concentrate on was creating as nice a kitchen as our dollars would let us. So that meant the usual suspects: IKEA cabinets, cheaper countertops (we wanted Ceaserstone), and less cabinetry. We also kept the stove that came with the home as we did not have the Benjamins to splurge on a new one. We also kept our old refrigerator. The only appliance we bought new was the dishwasher, also from IKEA.

I'd like to show you how we took $559 and made ourselves a pretty cool island that we love.


1. First, we outlined the footprint of the island, 3'x6' with Blue painters tape. FYI, the kitchen is not finished in these photos.


2. The next step was to build a frame base. Here we used 2x4s that are held down with angle brackets. Do you see the dresser under the window? That is an IKEA MALM bedroom dresser that we will be using as part of our island.


3. Once the base was built, we attached the MALM dresser. To the left of the dresser (as seen in this view) is an IKEA base cabinet. We found it in AS IS at IKEA and it was in rough shape as you can see. We snatched it up for $10!!

4. With both bases in, we can now move on the next step: the sides and top.

5. For the sides and the top we decide to use IKEA wood countertops. We purchased two; each one is 3'x6' basically. We cut one right in half, and voila, the sides of the island!


6. The top is, you guessed, a full sheet of the IKEA wood countertop. This is so heavy, we barely had to fasten it in place much, we just used two brackets on either end, tucked away inside so you can't see them.

7. For the face of the island, we attached a piece of 1/2" plywood to the 2x4 base and the back of the cabinets. We then used a sheet of vinyl wall panel (called Plas-Tex) that we picked up at Lowe's. It is attached with Liquid Nails, that's it. So far, its held up well. Easy to clean kick marks too!

8. This is what the other side looks like. the MALM drawer gives it a very refined look we think. The only thing left to do is to add some shelving on the right and a toekick.


9. Yes we would have liked to have some doors here instead of exposing the pots and pans, but the budget wouldn't allow it. Nobody sees this side as much anyway so we're ok with it.

Well, there you have it, our $559 kitchen island. Hopefully, it will inspire you to do something you're happy with, and not spend too much money doing it. I did sand it and seal it when it was all put together of course.

Here is a list of the items we bought (with prices, rounded to the nearest dollar) with links, if available:

(3) 2x4s (10'), Lowe's, $8.40 + tax = $9
(2) Countertops, IKEA Numerar $390 + tax = $424.
(1) IKEA Malm dresser, $69.99 + tax = $76
(1) IKEA Base Cabinet, (AS IS), $9.99 + tax = $11
(2) Shelves and back of island, Lowe's, made from (1) 4'x8' sheet of 1/2" plywood, $15.97 + tax = $17
Plas-Tex Vinyl Sheet, Lowe's, $19.98 + tax = $22
Total: $559

See more of the customised kitchen island.

~ Danny Cerezo, Los Angeles, CA

Wednesday, 12 December 2012

Entertainment Storage in Design Studio


Photo: IKEA.com


Materials: PAX Wardrobe & Nexus Black/Brown Cabinetry & Numerar counters

Description: Design Dilemma: Create a storage solution with SCALE in an Interior Design Studio with 12' ceilings.

Solution: Combine PAX Lyngdal sliding glass door storage (96" tall x 118" wide x 17" deep) ABOVE 3' high x 13' wide Akurum/Nexus Black/Brown base cabinets with Numerar counters. (Non IKEA: 2 U-Line beverage fridges, priced more than the rest of the entire project!)

We are recent empty nesters! Launched the last of our 5 kiddos last spring (yes: all 5 concurrently in college!)

We moved to an ultra cool urban "live/work" loft in Downtown Tulsa. I'm an interior designer, and set up a studio on the ground floor (approx. 800 ft2).

After 25+ years of accumulating, we were forced to "downsize". In this solution I have stuffed several dozen charger plates, assorted dishes, placemats, candles, silverware, glassware and even an entire setup for making s'mores out by the complex's gas fire pit!


I used a spare black/brown PAX frame to trim the upper unit, as the 17" PAX frame is only offered in white.

While I assembled all the pieces easily myself, it took 4 of us (including one REALLY big guy) to lift the PAX frames and Lyngdal doors.

We've lived/worked here for 6 months, and LOVE using this storage system. VERY functional.

I've included a couple of pics of how we "styled" the unit with a 7 foot wreath for the holidays!

~ Lori Schram, Tulsa, OK

Friday, 2 November 2012

Kitchen Table from Counter Top


Materials: Numerar Countertop & Norden Dining Table

Description: I purchased 2 Numerar solid birch countertops and 1 Norden dining table. I cut the width of the countertops down to 22" each side, but cut to the nearest block size. So one ended up about 21.5" and the other was about 22.5" so the seam looked natural. Next I cut the length to 70" to make it comfortable for 2 people to sit on each side. I used a biscuit jointer to glue the 2 halves together to create the full table top.

I cut the ends to a 48" radius. First by cutting the arc with a scroll saw, then finishing the cut with a template and a router. The template is just .188" hardboard, but its much easier to cut and sand the template to a perfect arc and use as a template for the router, than to try to cut a perfect arc on the table. The arc came out flawlessly on both sides.

The countertop come well oiled and I wanted a very light colored top so it took quite a bit of sanding to get all of the oil off the top and bottom.


Once that was done, I pulled the tabletop off the Norden dining table and put the legs onto the bottom of the new table. I needed longer stringers between the legs on 2 sides so I used one of the long cut off sections from the original counter top and sliced it down the middle to get qty 2 - .75" x 2.75" x 57" pieces to replace the short stringers with these long stringers.

I finished the table top off with several thin coats of low gloss tung oil and it looks beautiful, perfect size, nice solid wood quality and for less than $300.

~ Daniel Tagtow, Austin, Texas, USA

Wednesday, 4 July 2012

Solid oak desk for a designer


Materials: VIKA ANNEFORS, two VIKA ADILS table legs, NUMER�R kitchen countertop, sized at 126cm x 62cm.

Description: I just put up a blog on our website, about a desk that we hacked from Ikea parts. We�ve got a new employee starting with us soon, so I had to get another desk in.


See step by step instructions for the solid oak countertop workstation.

~ Kishen

Thursday, 28 June 2012

Desk with Meters


Materials: BESTA, FRAMSTA, NUMERAR

Description: I designed this desk to get all my computer equipment and cables up off the floor, behind cabinet doors, and leave my work surface completely clear. A major part of this project was also incorporating the analog meters which show my computer's status.

The desk is built mostly from modified IKEA parts (see the end for a complete parts list). There are wall-mounted cabinets in two depths. The lower center cabinets are cut to allow my monitors to be wall-mounted; the upper row holds my backup hard drives, video game consoles, speaker controller, UPS, printer, and other devices. In the right-hand lower cabinet, all the cables and interlinks between all the devices come together, fastened to a grid of garden mesh to keep them neat. In the left-hand cabinet (behind the meters) are device docks and chargers. The top cabinets are ventilated by small fans which turn on when the temperature rises, so that I can keep the doors closed.


The work surface itself is an eight-foot-long countertop on adjustable legs, which I stiffened by adding steel angles along the back edge. My Mac Pro is hung from the underside of the desk so that nothing is on the floor. The work surface can be pulled away from the wall or even moved into the center of the room (but the computer has to be unplugged first). Using a countertop gives a much more durable work surface than most laminate desks.

Below the wall cabinets are programmable LED strips behind glass panels, which show a moving stream of colored light (blurred to white in the image above). The lights' speed indicates the current CPU load of my computer. There are four INREDA spotlights mounted to the cabinet above to provide additional illumination on the desk surface.

The array of meters show the four cores of my CPU (top row), RAM usage (bottom left), and network send and receive (bottom right). The large meter on the desk shows overall CPU load.


Parts list and notes:

Wall cabinets

2 x BESTA Frame - 47.25W x 25.25H x 15.75D
2 x BESTA Frame - 47.25W x 25.25H x 7.875D
8 x BESTA Suspension Rail

First I hung the suspension rails on the wall. They clip together to produce one long rail, but I tried to attach each rail at least once to a stud. I used the biggest lag screws I could reasonably fit, because there's a lot of weight in the cabinets, and I had no way to discover the condition of the studs inside the wall.

1 x 3'-0" 2 x 10 lumber
2 x Rosewill RMS-MF2720 Monitor Mount

Then I mounted the monitors and cut the bottom cabinets: I mounted the monitors to a 2 x 10 which I fastened directly to the wall, and then cut a hole in the back of the cabinets to fit around that. I also cut down the sides of the bottom cabinets where they come together, so that the side panel fit behind the monitors.

2 x BESTA VARA Black-Brown Door (23 x 25)
4 x BESTA TOMBO Glass Door (23 x 25)
2 x rolls of frosted window film from Home Depot

The glass doors are clear glass (IKEA no longer makes BESTA system frosted glass doors with metal frames) so I applied frosted window film to the inside of the doors. This requires some patience if you've never done it before.

1 x Metal grid and mounting hardware (from Home Depot)
4 x J hooks (from Home Depot)
2 x Cabcool 1201-2 Fan Kit (from Amazon)

I did a few last modifications to the cabinets on the ground before I hung them. I mounted a small section of 2" garden mesh in the back of the right-hand cabinet to clip cables to, and I installed the cooling fans in the right two compartments of the top row, where my game consoles, backup hard drives, and power supplies would generate heat. I also drilled 2" diameter holes between all the compartments so that I could run cables inside. (All this cutting works best if you do it before the cabinets are put together.) Once they were up, I attached hooks to the bottom of the cabinets behind where the glass would go, so I could run cables there without them dangling down under the desk. (E.g., see the cord going down to the outlet in the pictures.)

2 x FRAMSTA Basic Unit
2x FRAMSTA Glass Gray Panels (2 pack)

Once the cabinets were up, I attached the glass panels upside-down to the bottom of the cabinets. This is a bit tricky but works fine once everything is together.

Desk

1 x NUMERAR Countertop 96.875"
4 x VIKA KAJ Adjustable Leg 4
1 x 72" x 1.5" in. Zinc-Plated Steel Slotted Angle (from Home Depot)
1 x MacCuff Pro from Sonnet

I used a countertop because it is much more durable and much bigger than any desk top IKEA sells. I turned the counter upside-down and attached everything to it on the ground. The steel angles are quite invisible when everything is put together, because they are turned up behind the desk. I put felt pads on them (as you use under furniture) to stop them scratching against the glass panels.


INREDA LED spotlights
After I finished, I discovered that while the LED strips provided plenty of light to see or type by, they were insufficient for tasks like drawing or soldering. I installed four adjustable LED spotlights on the underside of the upper cabinets.

See more of the desk with meters.

~ Matthew Fickett

Monday, 25 June 2012

Numerar standing desk


Materials:
NUMERAR/VIKA BYSKE LEGS

Description: Looking to transition to a standing only setup, I purchased two NUMERAR counter tops (double sided). They were 73 inches wide, with silver trim.


They are extremely HEAVY. Then I purchased 5 BYSKE legs for each .. and Capita brackets with the LACKY top.

~ Eric, Baltimore

Saturday, 14 April 2012

Speaker stands for vintage Diatone speaker system


Materials: Chopping board Kraftig, chopping board Magazin, countertop NUMERAR

Description: I needed good solid stands for for vintage Diatone speaker system. The speaker system is very heavy, 27 kg /piece, stands should be sturdy and rigid.

The general idea - posts must be stable and unnoticeable in the interior.
I do not like the design of high-tech style.

Design and construction I came up with himself.


Unfortunately, I don't have the carpentry workshop... where to get a good semi-manufactured material from wood? It's not the first time I am using products from Ikea to craft for my home ..so I made a quick and direct route to IKEA.

The easy way .. find and use off-label.

So, my choice:
- chopping board Kraftig
- chopping board Magazin


And a NUMERAR countertop leftover from a previous project.

OK, stages:

1) Chopping board Kraftig - this will be the base of the stands.

- chopping board Magazin - top shelf.
With a hacksaw need to cut off the part, get a top shelf and the rear side.


countertop NUMERAR - from the old remnants made the vertical column, also with a hacksaw.


2) Fitting


3) Toning all parts of the same color.
I pasted on contact paper, same wood colour.


Finish varnished with lacquer.

4) So, assembly.

Drilled 4 holes top and bottom.


Long screws are very hard to tighten.
To make it easier to tighten, they were lubricated with liquid soap.

Felt glued to the bottom of the Base, felt just bought in Ikea.


The End !!!

See more of the speaker stand for vintage diatone speakers.

~ Sergey, Moscow, Russia.

Monday, 2 April 2012

Numerar dining table


Materials: Numerar, Lilleby, drill, angle bracket, paint

Description: It is a fairly simple hack. My wife and I were looking for a modern dining table to replace our traditional round one. We wanted a solid wood top but they were too expensive for us. We were browsing around Ikea one day and saw the oak Numerar kitchen countertop and thought that it would be perfect for us. We decided to use the Lilleby legs because we like the simple look of them. And both items were on sale; can't say no to that.


1.) I started by sanding the paint off the Lilleby pieces, sanding them after it is assembled will be difficult
2.) Put the Lilleby together
3.) Paint to the colour you wish
4.) Measure and draw where you want the lilleby legs to be mounted to the numerar
5.) Buy angle brackets from home depot and fix the lillbey to the table top
6.) Enjoy the table

~ Roy, Vancouver

Sunday, 18 March 2012

Landing Zone


Materials: NUMERAR Countertop x 1, BEKVAM Kitchen cart x 2

Description: So in the search for a new desk I wanted, I turned to Ikea to see what they had to offer. I went through the entire catalog to find a desk but was sadly disappointed in all the sizes of the desks available.

As I was walking out of the section I noticed the counter top. Specifically the NUMERAR counter top. It measures a total of 72"x40" and was the perfect size for me. However I still ran out of ideas on how I was going to keep it afloat over my chair.


That's when I found the BEKVAM kitchen cart. They were small enough to act as legs and provide room for my chair underneath the desk while holding the table up. They also act as two cool shelves on my desk.

I purchased 2 kitchen carts and the counter top and began deciding how to make it.

I put the kitchen cart together, but noticed it was rather high. It stood about 4.5 feet off the ground. Far too high for my chair.

So step 1:
Construct the kitchen cart.

Step 2:
With a wood saw, cut off the legs that do not have the wheels attached to them.
CUT TO LENGTH OF LEGS WITH WHEELS.
Do not use the wheels at all.

Step 3:
You should now have an equal standing kitchen cart without the wheels installed.

Step 4:
Place each kitchen cart about 3 feet apart from each other.

Step 5:
Place counter top (with help of someone, seriously, the thing weighs like 150 pounds) on top of kitchen carts.

Step 6:
Enjoy the massive desk you just created from a kitchen counter top and two kitchen carts.

See more of the kitchen cart workstation.

~ Carlos B., Southern California

Monday, 12 March 2012

Kitchen with a twist

Kitchen with a twist

Materials: Abstrakt cabinets with high gloss gray/white door fronts and drawers, Abstrakt refrigerator/fan cabinets, Nutid oven / microwave (30 inch) Besta Burs media storage unit, Numerar counter top (black with steel look edging) Numerar birch conuter top, quarter inch iron brackets (made at local foundry), Medium Foto pendant lamp over table,

Description: Our inherited kitchen was old, badly planned and left me with little inspiration to cook!

After looking at numerous styles, designs and crazy prices, I came up with a design which catered for all of the family needs and budget.

Welcome to Form meets Function and the savvy use of Ikea above Fridge Freezer Cabinets and Besta storage unit.

After the removal of the existing kitchen and the re-positioning of a door way, we were good to go.


Kitchen with a twist

We built a studded and drywall frame to house the 30 x 80 oven/microwave cabinet, the fridge/freezer and a 24 x 80 pantry. To make the poorly designed oven cabinet fit we had to cut down several of the drawer fronts. Several trips to Ikea were fruitless so we had to improvise.

The kitchen island was made using the standard double sink unit, the dishwasher and two drawer units on either end. An Ikea Numerar birch wooden counter top was cut down to make the side pieces with a high gloss white cabinet end piece used for the back. We cut down more wooden worktop to make the breakfast bar.

The most unusual part of the kitchen was the use of six over refrigerator/fan cabinets. We put three of the 30 inch units on the floor topped with a cut down counter top. We then stacked another cabinet on the end unit with two more "floating". This was done by using thick iron brackets screwed into studs to take the weight.A straight iron bar was put underneath to spread the load. On top of the middle unit we put an induction cooker top with extractor fan above a stainless steel backsplash.

We used a a Besta Burs media storage unit on a wall of slate. This storage unit holds glasses and mugs. The slate wall as well as being a design feature absorbs the mid day heat to add natural warmth to the kitchen.

The lighting on the ceiling was replaced using the existing fittings with a mixture of Ikea lighting and lights from another big box store.

To frame the large chalkboard we used the left over birch counter top.

~ Sharron Matthewman, Alberta , Canada

Friday, 2 March 2012

Dining and Homework Center


Materials: NUMER�R Countertop, AKURUM Wall, ST�T drawer and doors

Description: Two shallow drawer cabinets were installed along the wall set the width of the counter apart. A larger counter top was purchased than needed and cut to the length and width needed for the space. The extra counter pieces leftover were cut to fit on top of the drawer cabinets. They pieces were put into place and the table top was put on the wall with 2 L brackets and 4 legs. The remaining wall units were placed on top across all the table surfaces. The result is a custom looking built in unit that provides seating, great storage and a place to prepare food.


~ Ruth, Bay Area, CA