Showing posts with label bathroom. Show all posts

Monday, 29 April 2013

Narrow Bathroom Units


Materials: LILLA…NGEN Bathroom Units

Description: We have a narrow bathroom, but needed to put some base units in to cover existing pipework and provide some storage. Ikea have the narrow LILLANGEN washbasin cabinets but no other narrow base cabinets - so we used the upper wall cabinets as base cabinets. Batons attached to the wall brought them out to the same level as the sink unit. For the worksurface we used Pragel worktops cut to size.


~ Ian Grange, United Kingdom

Saturday, 13 April 2013

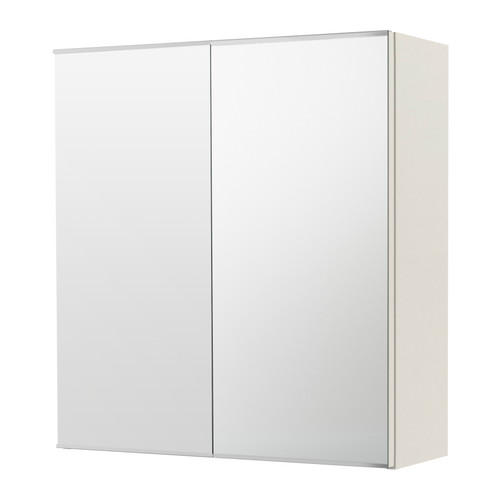
How-to: 30cm LILLÅNGEN mirror wall cabinet


Photo: IKEA.com
Materials: Two-door mirror wall cabinet LILLÅNGEN 202.051.71 (pix, right)

Description: There is just no such thing as 30-cm wide LILLÅNGEN mirror-doored wall cabinet. As a matter of a fact there is also no 90-cm cabinet of such kind. Wall cabinets with full mirror doors are available only in 60cm and 40cm widths so if you need to fill 90cm or 30cm of wall space then you need to hack.

IKEA product used: Two-door mirror wall cabinet LILLÅNGEN 202.051.71

Tools used: circular saw, hacksaw, 5mm drillbit, 8mm drillbit, 15mm hole-cutting drillbit, powerdrill. Clamps. You can never have too many clamps.

HOW-TO:

to modify the width of the cabinet you need to hack only three parts from the original set. Backboard, upper end and lower end.

Backboard is the easiest part so if you want to get warmed up then you can start here. Just separate two backboard pieces by cutting the tape connecting them and saw off 10mm of the taped edge from one piece.

Top and bottom pieces are identical but need some steady hand to work with, especially when drilling. So let's get started.


First cut the pieces to length with circular saw. Clamp two pieces together perfectly aligned and mark the desired length. You will aim for 268mm length after cut so please be sure that you are familiar with your saw and know exactly how it cuts. I used a bit of masking tape on top to reduce chipping by sawblade.


Now comes the interesting part - drilling the holes. I'd like to start with 15mm top holes. Please note the pattern of positioning of the holes. Centers of the 15mm holes are positioned 34.5mm from the end of the board and 38/28 mm from the respective sides. Drill carefully and use some kind of measure to compare the resulting depth with original holes.


Proceed to side holes. Easiest way of marking the correct hole positions is to use the cutaway part from the top/bottom board. Align it carefully with your piece, clamp it and use right-angle ruler to mark the borderlines of original holes to your piece. Drill the holes. 5mm hole depth is about 23mm. 8mm hole should just be drilled to meet the top holes.


That is your finished hacked top (or bottom) piece. Repeat the drilling with other piece.


When you have your hacked top/bottom and backboard ready then it is easy sailing from there on. Just assemble your lean 30cm cabinet according to original instructions (obviously sans one door).

~ Martin, Estonia

Friday, 12 April 2013

Pax Fill-In-Shelves


Materials: Godmorgon Wall cabinet, Pax Shelves, hanger bolts, circular saw

Description: I wanted to fill the gap between our to Godmorgon Wall cabinet with some shelves.
The local hard ware store didn't provide any board that would fit to the black-brown cabinet corpus. By chance i found out that the Pax-Series used the same veneer as the Godmorgon bath series, so i could use the shelves from the Pax wardrobe.


To make the mounting invisible I doweled two hanger screws into the wall by temporarily locking two nuts on the fine winding. Then I cut the boards to the right dimensions and drilled holes the same diameter as the hanger screws into the left side of the shelves, hoisted the shelves onto the screws and put two wood screws per shelf through the side of the wall cabinet. So there are no visible parts the mounting what creates a very clean and tidy look.

~ Thomas Krechel, Germany

Friday, 29 March 2013

12" Depth Bathroom Vanity


Materials: 4 AKURUM Wall Cabinets, LILLÅNGEN Sink, RÖRSKÄR Faucet

Description: My customer needed a shallow bathroom vanity to increase the available space in her bathroom for her disabled mother.

Cost was also an issue.

I used 2 full length AKURUM wall cabinets (12" depth) and 2 smaller over the refrigerator type AKURUM cabinets to create a hanging vanity. Also to allow airflow from a poorly placed heating vent.

The top is made from tha same mosaic tiles I used for the shower floor. (She needed a zero entry barrier shower due to her wheel chair)


Total cost for the vanity was:

Sink $93.00
Faucet $43.00
Cabinets: $130.00
Doors: $94.00
Handles: ~$20.00
Tiles: 8sqft @ 4.20 = $34.00
Misc : $25.00

Total: $439.00

That is the retail price, although I picked most of this stuff up in the ASIS section, it ended up costing me about $280 and some effort.

~ Lord_Piot, Ottawa, ON, Canada

Saturday, 2 March 2013

A warmer and single sink GODMORGON


Materials: GODMORGON

Description:My idea was to make a simple, chic, not too modern cabinet for the main bathroom. I chose the IKEA GODMORGON cabinet with two drawers for its size and simplicity. The thing is, IKEA does not offer more than one option for the counter (2 built-in sinks in a glossy white counter) and it is far from what I wanted.

My first goal was to built a wood counter massive as a fireplace tablet. Because I didn't want to use legs for the installation of the GODMORGON, I couldn't obviously use a huge beam of wood because it would have been too heavy and too expensive for its use anyway. Plus, I had to think about the weight of the sink over the weight of the counter over the weight of the cabinet that was only fixed in the wall... I had to find a way to lighten the weight on the GODMORGON so it didn't tear off the wall after few months! So, for the counter, to strengthen the structure, I built a base in plywood and chose a very lightweight wood to cover it (see the detailed pictures of the inside on my blog). When I installed my counter, I fixed it in the reinforced wall independently from the GODMORGON cabinet. So that way, the weight is not all on the cabinet.

The second challenge was to find a way to put the sink in the center of it. I thought two sinks takes too much place and there is no more space left to spread all the things a girl need to get ready (and less for her man who needs to shave at the same time!). So that part is a tricky one because there is a division panel in the cabinet that cannot be remove. The plumbing must get around it and one row of each drawers needs to be removed so they can still close fluidly.

That IKEA hack was not an easy one because it was not made for a single centered sink on a heavy countertop but it was worth the trouble. Two years later it's still fix on the wall that didn't tear off and makes my proud each time I make a guided tour of my home! (see the entire bathroom here)

~ Annie, Montreal

Tuesday, 19 February 2013

Bathroom vanity hack: Optical illusion with secret storage space

before

Materials: Akurum kitchen cabinets, Nexus doors, Bastig knobs

Description: We turned our powder room into a full bath by adding a shower. Since our room is only about 6x6.5 ft, we had to get creative when it came time to build a vanity.

1. I wanted the vanity to have BIG impact to off-set the new shower. I wanted you to not really notice the shower that much.

2. I needed clearance for the toilet.

3. I wanted storage in my small space. Lots of storage.


To create a big impact I wanted the vanity to span the entire wall, but I knew that with the clearance issues for the toilet, I could not make it very deep.


Our solution was to use two AKURUM wall cabinets, which are 12 inches deep. We went with the ones that are 24 inches tall.

We chose a vessel sink that would over hang the cabinets for a more modern look.

After hanging the first cabinet for the sink, we needed the second cabinet to be much less deep. I measured a toilet roll and settled on a 6 inch depth for this cabinet.

The cabinet was cut all the way around and we attached the back to the more shallow cabinet before hanging it.

The table top we made out of 3/4 solid oak flooring with 1x2 oak trim. Then I stained it (4 layers) of ebony stain, then gave it three coats of satin poly.

You can read more about our powder room turned full bath here.

~ Katja @ Shift Ctrl ART, California

Friday, 8 February 2013

Bathroom vanity hack: Optical illusion with secret storage space

before

Materials: Akurum kitchen cabinets, Nexus doors, Bastig knobs

Description: We turned our powder room into a full bath by adding a shower. Since our room is only about 6x6.5 ft, we had to get creative when it came time to build a vanity.

1. I wanted the vanity to have BIG impact to off-set the new shower. I wanted you to not really notice the shower that much.

2. I needed clearance for the toilet.

3. I wanted storage in my small space. Lots of storage.


To create a big impact I wanted the vanity to span the entire wall, but I knew that with the clearance issues for the toilet, I could not make it very deep.


Our solution was to use two AKURUM wall cabinets, which are 12 inches deep. We went with the ones that are 24 inches tall.

We chose a vessel sink that would over hang the cabinets for a more modern look.

After hanging the first cabinet for the sink, we needed the second cabinet to be much less deep. I measured a toilet roll and settled on a 6 inch depth for this cabinet.

The cabinet was cut all the way around and we attached the back to the more shallow cabinet before hanging it.

The table top we made out of 3/4 solid oak flooring with 1x2 oak trim. Then I stained it (4 layers) of ebony stain, then gave it three coats of satin poly.

You can read more about our powder room turned full bath here.

~ Katja @ Shift Ctrl ART, California

Friday, 1 February 2013

Vanity from HEMNES Dresser


Materials: HEMNES 3 Drawer Dresser

Description: My husband and I needed a vanity with storage for our master bath remodel. We couldn'??t find the one we liked at the local hardware stores and online, so I searched IKEA Hackers for an idea and sure enough found a vanity made out of HEMNES Dresser! Since our bathroom only had one sink, we decided to use smaller three drawer dresser.


1. Assemble the side panels.
2. Cut each leg so that the vanity will be your desired height. We used a circular saw to do this.(The height of our vanity is 36".)
3. Assemble the rest of the dresser except the drawers and the top.
4. Install the countertop and the sink. (We hired a professional since we wanted to use the same marble we used in the kitchen.)


5. Reconfigure the top two drawers as shown in the pictures. We used the leftover wood pieces found in our garage as needed. (We were too lazy to make all the pieces a same height, as you can see.)

We absolutely love how our vanity turned out! I was a little concerned about whether marble would be too heavy for this piece, but we'??ve been using the vanity for almost four months now and so far we haven'??t had any problem at all. In fact, we love the HEMNES series so much that we hacked another HEMNES cabinet to add even more storage for our master bath! Happy Hacking!

See more of the Hemnes vanity.

~ Asami

Monday, 28 January 2013

Bathroom bookcase


Materials: Billy bookcase, Kvissle organizer

Description: I redecorated my bathroom with all new Ikea products but the one that was hacked was the Billy bookcase. I wanted something that spaced the sink from the wall just enough and would also align with the sink/cabinet. The only thing I found was the bookcase. I also wanted it to float with the sink cabinet but align with the window frame.


1. I plugged in my table saw to cut about 3 inches off the bottom of the side panels of the bookcase so the bottom would align with the cabinet.
2. Cuts were made before assembling the bookcase. I only had to cut the side panels as the back isn't as long.
3. I cut a 2x4 to a shorter width than the cabinet/bookcase so it wouldn't show from the side and bolted that to studs in the wall. Both pieces rest on that.
4. I had to modify the wall mounting portion of the cabinet so that would bolt to studs in the wall but the bookcase is only attached by one screw with angle metal on the bottom going into the 2x4 support and one screw with angle metal in the top corner that goes into a stud. Since the 2x4 supports the weight it doesn't take much to keep it there.


~ Chumly

Wednesday, 2 January 2013

A Fullen Washstand Re-Vamp - Bathroom


Photo: IKEA.com
Materials: Fullen Washstand - Melamine

Description: We recently tiled our bathroom and fitted a shower bath but having a small bathroom, we were pretty much limited to the size of washstand we could fit in and the Ikea Fullen one had the perfect dimensions. It looked a bit cheap (and it was at only �20) and needed something doing with it.

We kept the housing as it was but took off the flimsy doors and a friend who works in a local kitchen company made me 2 thick bevelled edged black, gloss doors. We fitted those and bought new handles to match the other handles we had in the bathroom.


I then bought a couple of chrome radiator pipe covers and fitted them to the bottom of the legs on the washstand so they look like metal feet and I covered the internal thin shelves in a zebra print plastic. This not only protects the thin wood from rotting when returning bottles that have been used in the shower and bath but looks great too.


We then bought the Talleviken sink for �50 and used the mixer tap we took off the old sink we disposed of. We are really pleased with it and the whole unit cost �70 with a small added cost of new doors and handles.

~ L.D., Manchester, UK

Friday, 28 December 2012

All-In-One Multipurpose Bathroom Furniture which hides a washer & dryer


Materials: Ikea Personlig Countertops, Kitchen Cabinets/Doors, Socket Lists Optional Sink /Faucet

Description: This is my second Ikea Hack :-)

I want to show you how I made my bathroom more organized by using different Ikea parts making an All-In-One bathroom furniture.

My bathroom was terribly organized,a shower in the corner, washer/tumble dryer in the other corner and a faucet/sink with a mirror in between.

I'd like to keep the room tidy with a minimalistic touch, so I planned to integrate most of the bathroom accessorize on one side of the bathroom, problem was the big washer/tumble dryer which always seemed to be in the way..


Then I came up with the idea to hide it in a cabinet or something like that... unfortunately the machinery is large, heavy, and they also move/vibrates, so I couldn't manage to find any suitable cabinets to solve my problem. I needed to make it myself, so I went to ikea to fix it!

I bought 3 Ikea "Personlig/Personal" Countertops, in the double sized thickness (8cm), normal countertops are 4.cm. The "Personlig/Personal?" counter tops can be ordered in which size you want, the European washer/tumble dry are deeper than the original standard countertop size 62 cm, and the doors had to be shut properly
so I ordered 70cm depth/220cm length.

2 x 60cm for the dryer/washer, 80cm for the center cabinet, 2 x 8cm sidewalls and 4 cm for clearing = 220cm

The sidewalls are equal 70cm depth and 86cm height. Cabinet is 70cm tall but you have to put the legs on it, so remember to add another 16cm (height)

The machinery stands on the floor, and the construction is build around it.

I used a kitchen socket list to hide the lower parts, installed ventilation in it, for air circulation.

The doors have no handles, I used the push-open solution.

To attach the doors in front of the dryer/washer, I bought a second cabinet frame and attached 1 sidewall too each side of the center cabinet, which makes you able to use standard Ikea door hinges..

I guess the picture explain the rest, pretty straight forward, and it works and I am very happy with it!

~ Peik Helly-Hansen, Norway, Oslo

Wednesday, 19 December 2012

From Grundtal to Shower Shelf


Materials: Grundtal hanging system, wall anchors with screws, silicone, Grundtal 'S' hooks

Description: Turning the Grundtal hanging system into a shower shelf is easy. Instead of hanging the shelves on the hooks enclosed use the predrilled holes to attach them to the shower wall using wall anchors. Once the screws are in the wall cover the screw heads with silicone to keep the moisture from rusting the heads.


If your bathroom fixtures are oil rubbed bronze lightly sand the shelves and use oil rubbed bronze spray paint (any brand) to change the look. Make sure to follow the manufactures instructions for drying before you hang your shelves to avoid any scuffs. The Grundtal 's' hooks are great for hanging your shower poofs and wash clothes from.


See more of the Grundtal bathroom shelf.

~ jacque, Tennessee

Friday, 14 December 2012

Fullen on Fullen


Materials: Fullen

Description: The Fullen sink base cabinet is very low compared with the height of my sink, so I thought why not put two on top of each other?

I cut of the side panels on the reduced Fullen so they would fit under the normal Fullen. I drilled new holes for the assembly pins and put it together as normal. This part will be without doors so I left out the part with the hinges.


Then I cut a new hole for the drain pipe in the top panel of the normal Fullen with a jigsaw and put the shortened Fullen version on top and fixed it with some small screws.

I followed the rest of the instructions and fitted the combo with doors, back panels and legs.

~ Jens Kl�ve, Copenhagen

Thursday, 6 December 2012

With FAKTUM/AKURUM in the Bathroom


Materials: FAKTUM/AKURUM cabinet, H�RLIG fronts, PR�GEL Countertop, CAPITA Leg, sink (TOOM hardware Store)

Description: I used 3 FAKTUM/AKURUM cabinets 60x57x37cm (for extractor fan) with shortened and cut PR�GEL countertop (186cm), H�RLIG fronts and ATTEST handles. I screwed the rest of the countertop vertical on the backside and mounted the sink in the middle. The legs are CAPITA 4''. The water pipe installation is located in the middle cabinet.


On the wall I used 2 horizontal FAKTUM/AKURUM cabinets 92x40x37cm also with H�RLIG fronts and ATTEST handles. Underneath I screwed another cut PR�GEL countertop (186cm) with the wiring for the lights and socket inside.

Clean look and a lot of space inside for only 300,- EUR.

~ G. B�hm Erfurt, Germany