Showing posts with label Effektiv. Show all posts

Sunday, 18 March 2012

Kitchen Island for small spaces


Materials: Effectiv cabinets, Vika Amon table top, Rill locking casters

Description:
I live in a two room old farmhouse with very limited storage and absolutely not a single closet at all. Thus I am always trying to find pieces that will hide my clutter. I have matching Effectiv floor cabinets and wall cabinets which I purchased second hand off Craigslist and I wanted to replace my kitchen table and chairs with an kitchen island that would house some food and dishware and take up less of a footprint in my open concept kitchen/dining room/living room/office.

The problem is that most kitchen islands are very expensive and take up a lot more floor space than I have to spare. And I really wanted something that would flow with the Effectiv cabinets behind it.


So I scoured Craigslist some more until I scored two of the 2-door Effectiv cabinets for $30.00 from someone who was moving back to Australia. On the way home from picking them up, I popped into Ikea and bought a Vika Amon table top in matching birch for $30.00 (I maybe could have gotten something cheaper by haunting the as-is bin, but I really wanted to get the whole thing done asap) and two sets of Rill locking casters for $20.00. Then I went to the local hardware store and purchased a 4'X6'piece of birch plywood for the back of the piece, which they kindly cut to my specifications. Next door is a store called Jysk which is mostly just a fancy dollar store with furniture, and for $4.00 each I bought two corner shelves (shaped like pizza wedges) that were 11" long on each side, to balance out the length of the table top, it being so much longer than the cabinets.

We (Dad and I) stacked the cabinets one atop the other and lined them up via the doors. Once they were attached to one another, we attached the table top with an approximate 2" overhang along the right and front sides and then affixed the birch plywood along the back. There is an approximate 1' overhang along the back for tucking your knees under when seated. Then we put the corner shelves along the left side. I was going to use 3 shelves, but from top to bottom the space between shelves was too short to be of any real use so we ended up just using two. The casters make it just high enough, and ensure I can move it around as necessary for cleaning.

Today I scored two bar height chairs off of Craigslist that look like the Franklin bar stool, but come in chrome and birch, for $30.00, to complete the chrome and birch colour scheme.

The result is a functional and small kitchen island with a faux butcher block effect top (which I intend to varnish to prevent staining, as it's unfinished) that matches the rest of my furniture, and only cost me a total of $120.00 total to cobble together and an extra $30.00 for seating. And the Gorm shelving unit I was using as makeshift pantry is in the mudroom as a shoe rack, since all the food and appliances that used to live on in are now in the island cupboards. I think I will probably tile the back of the unit at some point and put some edging/molding along the sides of the right side to hide the joins, but overall I am pretty happy with how it turned out!

~ Sheena, Vancouver BC Canada

Saturday, 4 February 2012

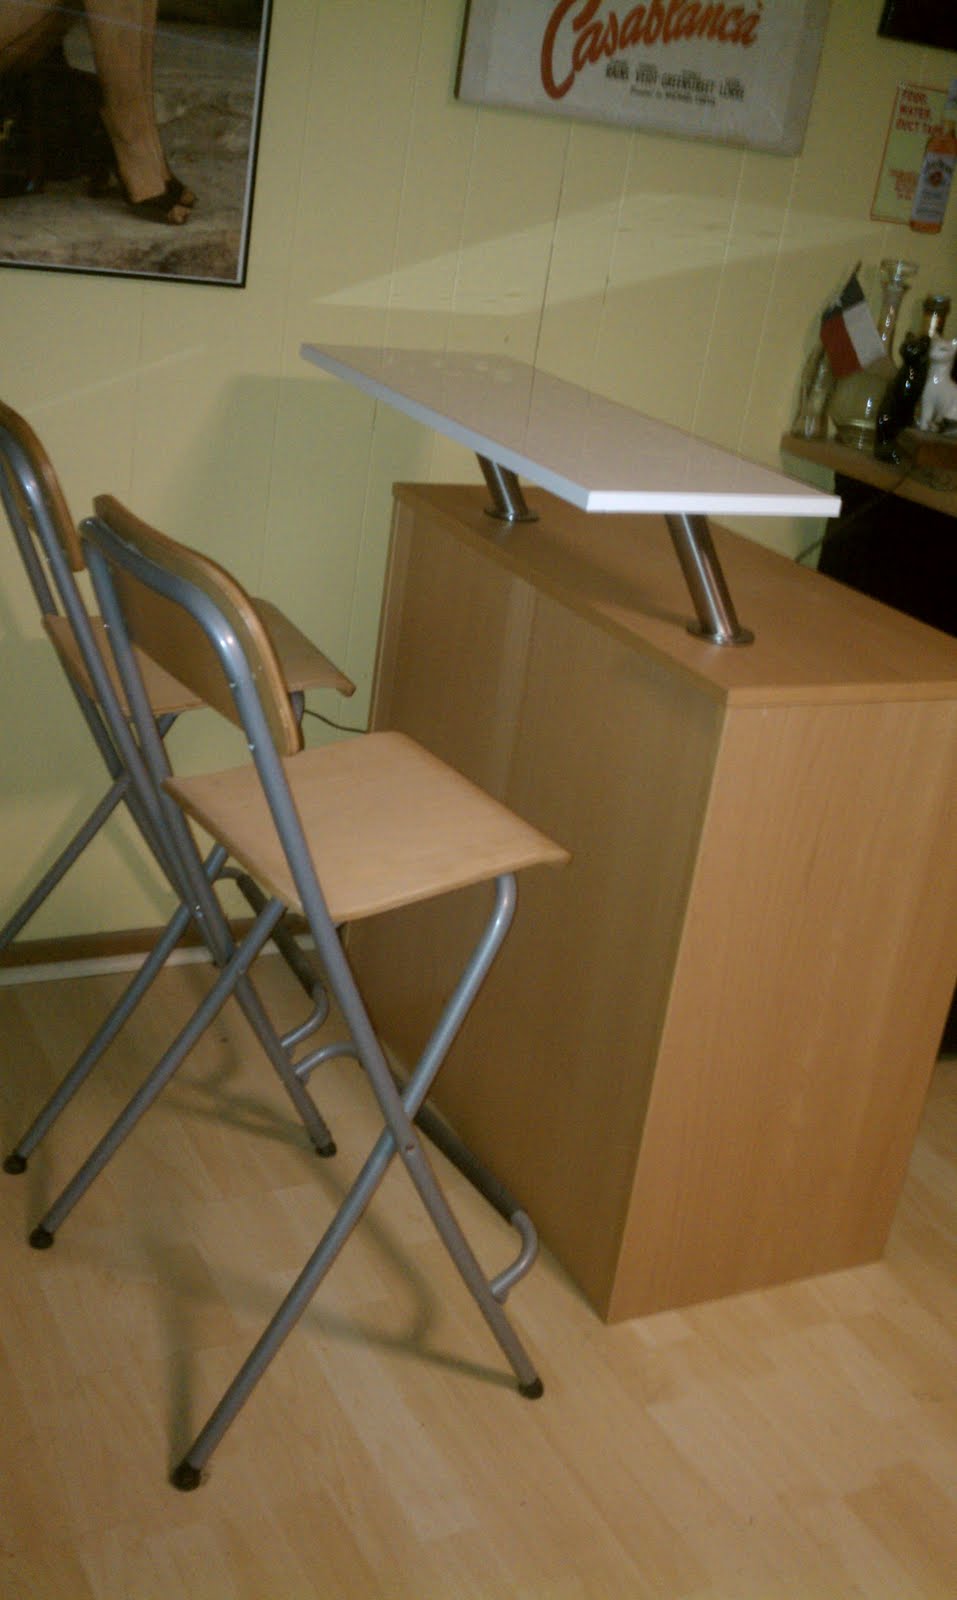
Cheap, (Almost) Instant bar!

Cheap, (Almost) Instant bar!

Materials: Effectiv, Abstrakt, Capita

Description: In this hack, I take an EFFECTIV Add-on (high), original price $80, purchased in the As-Is department for $45, a set of CAPITA angled brackets ($14.99), ABSTRAKT kitchen door piece, regular $74, also purchased in the As-Is department for $1.99. The first thing I had to do was take some isopropyl alcohol and remove the "As-Is" and item number written on the back side of the cabinet (which will be the front part of the bar). The As-Is department apparently now requires that the words AS-IS and the item # be marked in a prominent place on the furniture, which I find ridiculous, because it potentially ruins the piece. I lucked out and alcohol did the trick, but it still smudged a bit. It's not that noticeable. But I have a plan for that spot if it is too noticeable.


Cheap, (Almost) Instant bar!

The next thing needed to be done is install the shelves. Next, I mounted the brackets on the door, which will be the top of the bar.I had to use my own screws because the two inch screws were too long for the thickness of the door/bar top. I predrilled the holes using the recommended 1/16 drill bit. Naturally, I got confused and drilled the holes in the wrong place, so I had to start over, but no worries, it's on the bottom side and won�t be noticed. The measuring was really tedious and a test of my math skills. The instructions were for a much larger piece of wood to go on top, so it was challenging for me and my brain to make the adjustments.

The next step is to measure the space between the large bolts in the CAPITA brackets to ensure the correct placement. Then mark the holes and drill them. Only to find out that I do not possess a 7/16" drill bit/auger. So my project was put on hold until I could obtain the proper tool.

I took a trip to the local hardware store and obtained a 7/16" wood drill bit for $9.15 plus tax. Back home, I made sure and measured the space between the two posts three or four times. I knew it would be a one shot deal. Then I drilled the holes and started to put the bar top into place.

The only thing left to do was put the nuts and washers into place. Only now I can�t find the nuts and washers. I left them in the box, I knew that, but I couldn�t find the box. I scoured the house and couldn�t find it anywhere. Once my husband got home, I asked if he had moved the box, no he had not. He suggested the dog may have done something with it. Ordinarily this would be humorous, except that our 12 year old shepherd/boxer mix has a bad habit of taking paper products out into the yard and chewing on them. After a trip into the leaf-covered back yard, we discovered a half-eaten cardboard box with only one washer remaining. Further searching with the flashlight led to the discovery of two shiny nuts in under a leaf. I never found the second washer. For all I know the dog ate it. After a quick trip to the garage, I found a suitable replacement washer and was back in business.

I put the large plastic washers on the top side and I secured the nuts and washers on the underside of the cabinet. Unfortunately, I only had a short socket to turn the washer, so I ended up using a monkey wrench to turn it the rest of the way. (Always get the right tools!)

Total time spent about 3 hours, not counting the trip to the hardware store and searching the backyard. Total price: $70.13 plus tax.

~ Cathy Baumbusch, DC

Wednesday, 16 November 2011

How to: Use BESTA casters on EFFEKTIV base


Materials: 4 BESTA casters (2 per package), EFFEKTIV base

Description: With Ikea officially halting production of casters for the Effektiv file cabinet line last year, I've been on the prowl for a quality looking solution -- and this one will be easy-peasy!

1. Purchase 2 sets of 2 BESTA metal casters from Ikea. Item code: 401.341.87 This will run you 20 dollars. Use a small punch or other bolt to act as a driver and, with a hammer, tap out the preinstalled bolt through the bottom of each caster. This might leave a tiny nick in the wheel. The caster is now ready to accept a new bolt.

2. Run by Home Depot's nuts and bolts section and pick up 4 of the following - bin 3379, 3275, 3109. This will consist of a long bolt, washer and a self-locking nut. Cost is about 6 dollars.


3. Empty Effektiv cabinet and gently place on side. Remove base by unlocking the 4 tightening inset bolts inside the bottom box. If you've yet to assemble your tower, all the the better.

4. Thread a bolt through the slightly loose washer and then through one of the 4 holes in the base. The bolt should be facing down, towards the floor side of the base. Now slide the prepared caster onto the bottom and through the bolt. A tiny space is available between the wheel caster top where you can insert and lightly tighten by hand the self-locking nut. Using a set of wrenches or needle-nose pliers, you'll be able to lock and hold the bolt as you tighten the nut. Once tightened, repeat 3 more times.


Please note: The original feet accept a supplied bolt with a Y neck, which means the hole on the top side of the base is kind of wide. That's what the washer is for. But keep in mind to do your best to have the caster off center and inset. This will ensure that when the file cabinet is installed on top of the base, that the boards clear the washer. You'll see what I mean in the photos.

~ Paul Grant, Toronto, Ontario

Wednesday, 9 November 2011

Home office to reading room


Materials: Effektiv units, Billy bookcase, Benno DVD-tower, Lack side table, Signum cable outlet kit, Valborg cushion cover, Inner cushion, Rundel Wastepaper basket, Ludde Sheepskin, drawer-runners, metal angles

Description: We decided to change our home office into a reading room. The computer desk had to go because we wanted to get a room in which we could chill and read a book without being reminded of work.

We placed four Billy bookcases (31 1/2") and one Billy (15 3/4") into the room each enlarged with a height extension unit to have enough space for our books. In the corner we added one Benno DVD-tower to get a transition to the three Effektiv-combinations which should contain our folders and our computer. Our color is beech.


We decided to buy three plinths, five low add-on units and five high add-on units.
In the left part, we integrated our computer. We put a low unit on the plinth and added two high units. The low unit contains our laser-printer and the print-out paper. It is hidden behind two wooden doors. The first high unit contains our computer. I took two Billy extra shelves (had to cut 1/2" from the width), two pair of drawer-runners and some metal angles from the home improvement store to built one sliding keyboard shelf and one for the scanner. As fronts we selected the roll-front for the middle high units on the left and on the right. All three top high units got aluminum/glass patterned doors. The four low units got drawers with wooden fronts.

In the middle of the room we put an armchair and a footstool (that were in our living room before) and a Lack side table colored in high gloss red which perfectly fits into the room.


The room is illuminated with a Floor up light, a ceiling lamp and three bookcase lights which are mounted on the Effektiv-combination.

Now we can relax with a good book while the computer is hidden behind the roll-front.

~ Carsten, Germany

Wednesday, 19 October 2011

Effektiv cabinet concrete hack


Materials:
- 4 IKEA Effektiv cabinets. We used 85 x 43 x 94 sized frames
- 4 Effektiv series doors. We used high gloss white doors
- 4 sets of handles
- 3 25 kg sacks of concrete
- Board and screws for the mould
- Some steel for rebaring the concrete. We used old fashion chicken wire.

Tools:
- drill and mixer
- Plastic or tape if you want to protect the surfaces of the cabinets

Description: We launched our home building company LivingStone Kodit Oy and we started to decorate the office space. We build houses from concrete and we wanted our office to have a modern look with a rugged twist, something that would express our houses. We were wondering how we could achieve that and then it came to us, we must use concrete in our office. We decided to hack our Effectiv cabinets.


Start by attaching all four of the cabinets together. Try and get them as close together as possible.

Attach the edges of the mould. You can decide the height of the concrete cover but remember that concrete is extremely heavy. We made the cover 2 cm high and the weight is approximately 80 kg. Every centimetre is about 40 kg so be careful.


Mix the concrete and apply a thin layer on to the table. Spread it evenly and try to make it as dense as possible especially around the edges. It the concrete is not tight enough the edge will not be smooth and even.

Place the steel on top of the concrete. Time for a few tips about chicken wire: it is very flexible and it caused us a lot of problems. When we got one end covered with concrete the other end stuck out of it. Our advice is to cut the wire in to smaller pieces for example the size of a sheet of paper. This step will be much easier and quicker than it was for us.


Add the rest of the concrete and even the surface with a board.


Cover up with a piece of plastic so that the concrete won't dry too fast. If you want an extremely smooth top, rub down after about 2 hours. If you want the cover to have some character and be slightly jagged just let it dry.

Let the concrete surface dry for at least a couple of days preferably for a week, then remove the mould. Sand the cement off and polish the cover. Attach the doors and your brand new cabinet with a beautiful concrete cover is ready!


See more of the Effektiv in concrete.

~ Karl Filtness, Jyv�skyl�, Finland

Friday, 20 May 2011

EFFEKTIV standing desk


Materials: EFFEKTIV filing cabinet, wood boards, table legs

Description: The base of this hack is an EFFEKTIV filing cabinet with castors. I added some table legs and wooden boards to create a standing desk with a monitor support to get it up to eye height.

The height of the table legs depends on how tall you are. I used 30cm legs to get the desk board to a height of 126cm (I'm rather tall at 6'9") and 10cm legs for the monitor support.

The particular table legs I used have M10 screw threads at the bottom. I drilled a hole for each leg into the top of the EFFEKTIV and fixated the desk on the filing cabinet with hexagon bolts and washers. I did the same to fixate the monitor support on the desk board.

The two lights are JANSJ�, the basket for the cables and power strip are no-name from the hardware store and Bluelounge CableDrops keep the MacBook's power and monitor cable from dropping off the desk when detached.

See more of the Effektiv standing desk.

~ Thomas Borowski, Germany

Wednesday, 23 March 2011

Bathroom business


Materials: IKEA EFFEKTIV

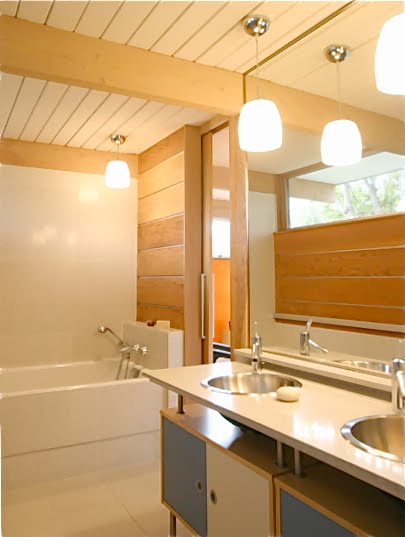
Description: The modularity of Ikea's office furniture makes it far more useful than the typical bathroom vanity cabinet. Cabinets and tops combined with Ikea Capita or Utby legs allow open shelf storage for out of sight but plugged in and ready to go hairdryers, curling irons,shavers etc.

~ Mark J. Marcinik, San Francisco, California

Tuesday, 22 March 2011

Flat LED lamp


Materials: EFFEKTIV door aluminium/glass No:901.094.54

Description:
* medium density fiberboard with white color on one side 40x80 cm
* LED Light chain approx. 3m, with white LED
* Hot-Glue Pistol
* small electric switch (it should fit into the frame of the door)
* two component epoxy glue


1) Cut out a hole for the switch. The lever should be on the outside, the body of the switch on the inside.

2) Fix the switch in the hole

3) Cut the cable of the light chain. About 1.5m away from the plug.

4) Fix the cable onto the switch, if you are not sure how to install the switch properly call your friendly electrician. Current is dangerous and should be handled careless.

5) Put the light chain on the fiberboard (white side) but leave a 5cm wide boarder

6) You can fix the led chain in every layout you want with your hot glue pistol.

7) Lay your door on to the fiberboard, the LEDs should take place between the the two parts.

8) Fix the door and the board with the two components glue together.

9) Drill two holes with 4mm even placed on the backside of the aluminium frame.

The holes are used to hang up the light just as a picture with frame

~ Peter Zeintl, Austria

Saturday, 26 February 2011

Half-pint Effektiv holds computer and subwoofer for media desk


Materials:
Effektiv cabinet, custom birch plywood table top

Description: Last year, we installed a large set of Effektiv cabinetry in the family room: shelving for games and books and drawers for videos and toys, etc. Two standard Effektiv wall cabinets across the middle created a 67" wide space for a desk, but Ikea has no good option for tables or desks 67" wide. So, we made a 67" wide birch-plywood "media desk" using this cut-down Effektiv cabinet for support. "Media desk" means that the cabinet contains and hides our media computer and the subwoofer part of the audio system. It also hides a large pile of cables, with the help of a Galant cable organizer.


The standard Effektiv cabinet is about 33" wide and 37" tall. Our half-pint is about 17" wide and 29" tall. The width is determined by the width of a single cabinet door, and the height sets the typing height of the table. Most of the modifications were made to the Effektiv plinth: it was shrunk to 17" wide by cutting a slice out of the middle to preserve finished edges on both sides, a large hole was cut in the top of the plinth for the subwoofer, and the front and back trim pieces were cut off 2" above the floor for airflow. The first picture shows the modified plinth, with subwoofer in place, without the top cabinet.


The Effektiv cabinet on top of the plinth was cut down to bring total height to 29", and the door cut down to match. The side pieces were cut at the top, to preserve the factory-machined attachment to the plinth. The door was cut at the bottom, to preserve the factory-finished edge at the top. A single shelf is used in the cabinet, cut in half and positioned 1" back away from the door to allow computer airflow. We left off the back of the cabinet, for cable management and airflow.

We repackaged the computer from a large conventional box to a "home media center" case, the Apevia X-MASTER-BL/500. Fits like a glove, perhaps a bit too tight with 1/2" space on the sides. The computer is an "undervolted" Intel Core Duo with a quiet power supply and disk drive. Air flow for the computer comes in the bottom by the subwoofer, up through the gaps in the plinth and shelf, around the computer and out the back. It's pretty quiet with the door closed, with slightly audible fan noise mostly from the high-end graphics card that we should replace because it's making the computer a bit too warm.

The subwoofer is happy in its new home. Six feet away or farther it sounds the same as it always did, for music or movies. When you're seated at the media desk with the music cranked up, the desk vibrates a fair amount. The kids like it.

The table top of the media desk is a piece of birch-veneer plywood, finished with satin polyurethane and bolted to the wall and the Effektiv cabinetry. We cut the leftover Effektiv door in half to make an extra shelf on top, supported on 6" Capita legs (another IkeaHackers idea).


The second picture shows the half-pint cabinet in place, holding up its end of the media desk. The Effektiv cabinet to the right is its unmodified big brother. We hope that the wood color will fade to match in a year or two.

~ Ken Sinclair, Boston, MA

Thursday, 27 January 2011

Pottery Barn inspired desk transformation


Materials: Effective Desk and wood file cabinets

Description: I was inspired by a desk set at Pottery Barn that I couldn't afford. I used my old (red/brown) Effective Desk and bought two solid oak file cabinets off craigslist for $75.

before

- I painted the Desk Top and the cabinets Benjamin Moore's Timid White
- I removed the Ikea legs and hardware from the desk and braced the back corner with some braces I fashioned from metal plates and $2 banister inserts from Home Depot. It is solid!
- The Desk Top just rests on the cabinets at either end.


I love how it turned out.

See more of the Effektiv desk transformation.

~ Nicole, BC, Canada

Friday, 7 January 2011

Back painted glass backsplash


Materials: Effektiv, Inreda

Description:
Our kitchen does not have a full splash and no matter how careful I am, I have spilled stuff all over the walls. I used to put a piece of cardboard paper around the stove everytime I cooked to protect the most affected area. We like the look of the trendy back painted glass backsplash but it is too expensive to have it custom made. We noticed that Ikea carries a lot of extra glass shelves for book cases and cabinets. All of these shelves are made of tempered glass; its resistance to high temperature and shock made it ideal for use in the kitchen area. The extra shelf of the Ikea �Effektiv� and �Inreda� series have a height of 14 inches so they fit well in between the granite and the cabinet.They are both priced at a steal of $10 a piece.

I googled the internet trying to find a paint that bonds well with glass. I found an outfit who sells glass primer paint online but you have to get it by a gallon and we only need a couple of ounces. We ended up buying from Michaels the Delta Permaenamel paint and Surface conditioner which is specially formulated for glass. We cleaned the surface really good, applied the Surface conditoner and painted it with two coats of Permaenamel. After the paint cured in ten days, we adhered the glass to the wall using a clear non corrosive silicone.


The �Effektiv� is 31.5� long and our back wall measures 95�. Three �Effektiv� panels turned out to be a perfect fit when we left approximately .16� gap in between the panels. The gap is hardly noticeable as we applied the clear silicone all around the edges to seal it and fill in any gaps. As for the side wall, the �Inreda� is only 22� in length so it comes up a little short. Originally, we were hoping to cut the �Effektiv� for a better fit but unfortunately, tempered glass cannot be cut or altered.


I�ve attached a before and after picture. The green glass backsplash really helps to brighten up our otherwise plain and boring kitchen. Besides being descent looking, it is also super easy to install, clean and maintain.

~ Rebecca

Tuesday, 2 November 2010

Effektiv Hallway Bench


Materials: Effektiv low add-on unit and shelf; Effektiv plinth; electric drill; Ritva cushions

Description: This was an unplanned, rather simple hack, so I didn't think to take pictures until after I put it together. I made a hallway bench from Effektiv parts, to coordinate with some other pieces I already own.


Instead of assembling the plinth on the base of the Effektiv cabinet, which would've made the bench too high to sit on comfortably, I drilled pilot holes in the top of the cabinet and mounted the plinth as shown. Two Ritva cushions finish the bench. It provides the perfect height and support for both me and my 6 foot, 280-pound husband, and holds up to 8 pairs of shoes.

~ Nanners

Thursday, 2 September 2010

Effektively hiding a cat box


Materials: Effektiv: base with legs, add-on unit (high), door; Metrik door handles

Description: Cat box hacks are becoming so common on Ikeahacker that this hardly counts as a hack. I thought I'd send it anyway, since I haven't seen the Effektiv used this way before.


It's the classic story (unsightly litterbox, small apartment) with a twist: my cat is messier than average, so she uses a CleverCat top-entry litterbox... which is great, but bulky.

It turns out the Effektiv office cabinet is the perfect size for this behemoth cat box, with enough space left over for storing spare litter, and even an electric air cleaner on a shelf! It was also relatively simple to make, just needing two holes, one of the shelves cut in two, and some angle brackets to keep the shelf steady. I can even add another unit on top if I need more enclosed storage later.

I have new respect for your apartment hackers and their hacks. I had to call in favours from three separate friends to borrow the tools and workspace to make this happen.

~ David Perry, Ottawa, Ontario

Wednesday, 1 September 2010

Classy built in bedroom


Materials: Effektiv, Hopen, Micke, Vika

Description: Once I figured out what I wanted to do this hack was pretty simple, knowing is half the battle. I used the Hopen 5 drawer units for the base Then I set the Micke drawers on top. On top of Micke I put an Effektiv cabinet with frosted glass doors. I mounted the Effektiv unit to the wall and screwed in two Vika legs under for extra support. Considering that I am going to be sleeping right next to this Ikea tower.


To add my classy details I used 2 rolls of damask printed wrapping paper from Target. On the glass drawers and doors I simply taped it on the inside. On the Micke drawers and on my wall I used Mod Podge (one of my favorite mediums) it can be found at any craft store.

~ Liz, CA