Saturday 30 June 2012

Bathtub nursing table


Materials: Sundvik nursing table, saw, screws and screwdriver

Description: Even though we have a large bathroom we really didn't have space to place an ordinary nursing table for our daughter in it. I wanted to place one on our bathtub but couldn't find one that would fit since the tub is 80 cm wide (instead of 70 cm "standard" measurement). Solution?


Take a Sundvik nursing table from IKEA, saw off the legs just below the second shelf (from the top) and place it on said bathtub! To prevent the nursing table from sliding over the edge, screw two of the dismembered legs to the underside of the bottom shelf. Plenty of storage space and the height is exactly the same as the original nursing table. We love it!

~ Christel Gade Licznerski, Stockholm

Duarte's Lighted Travel Map


Materials: PREMI�R and Ikea red Christmas lights

Description: Bored one evening before Christmas when my husband was working night shift...I was looking at out PREMI�R map and thinking how it could sticks pins through all the places my husband & I have travelled. Next to the map was the Christmas tree covered in two stands of little LED IKEA Christmas lights...OOOOH now there's a cool idea!

Down came the map, took the lights off the Christmas tree, poked holes in places we have been with a kitchen knife, popped the light through the back... secured with electrical tape... badda boom badda bing DONE! Took well under an hour. Be sure to cover lights that you are not using with electrical tape, otherwise they will shine through.

Easy-peasy hack and a real stunning feature in the home!

~ Melissa Duarte, Nelson, Canada

Living room built-in bookshelves and closets using BESTA shelves and PAX wardrobes


Materials: BESTA shelf and PAX wardrobe

Description: We had a largely unused wall in our living room and a mishmash of shelves and storage. We wanted something clean and integrated and a post of Centsational Girl provided the inspiration.

Our project took about 15-20 hours (a few hours here and there over the course of a week).

The space was 106" long which was perfect for 2 - 39" wide Pax wardrobes, 2 - 47" wide BESTA shelves and 1 - 23" wide BESTA shelf. We had to leave a little room because of the location of our return air grille.


We assembled the BESTA shelves first, and had to prop them up by about 4.5" so that the 5.5"� baseboards we were using would just cover the bottom of the shelf. We built a base using 2x4s and 1x4s. The BESTA feet can be adjusted to level the shelves and provided a little bit of adjustability to get the height just right.

Then we assembled the PAX wardrobes. We used 1x6 material (which happens to be 5.5" wide) to create a base and screwed that to the bottom of the PAX. This made it so the 5.5"� baseboards would perfectly fit underneath the doors, which cover the bottom of the pax. We also painted the flimsy backs of the PAX and BESTA units a light blue.

We screwed everything together and attached to the wall and added the baseboards.

See more of the Besta and Pax shelving.

~ Chris

Friday 29 June 2012

Quilters Table with storage


Materials:
2 IKEA Expedit (2 x 4) bookcases
2 sheets of plywood (3/4"�)
5 heavy duty casters
5 washers
5 lockwashers
leftover flooring
trim
18 - 20 L-brackets

Description:
1. Assemble the two bookcases

2. Cut the two sheets of plywood down to 6 ft (cut 2 ft off the long side). The sheets will now measure 4ft x 6 ft). Paint one side of each sheet to match/coordinate the finish of your EXPEDIT pieces. In my case, I just painted them white.

3. Mount 4 of the casters in the four corners (within 6" of the edge of the long side so that they will not interfere with the bookcases), and one in the center. The casters should be mounted on the side of the plywood that is NOT painted.


4. Position the bookcases parallel to each other but with 13 1/4"� of space in between them. Position the plywood (with the casters) on top of the two bookcases. You should now have a 6" overhang on the long ends, and a 2" overhang on the short ends. Secure the the plywood and the bookcases together with L-brackets (2 on each of the short ends and 1 in the middle of the long side).


5. FOR THIS STEP ASSISTANCE IS REQUIRED !! Turn the table upright (see photo above)

6. Attach the 2nd piece of plywood (painted side down) to the top of the two bookcases, using the same measurements you used on the bottom.


7. Finish the top with the covering of your choice. I used leftover flooring for mine. In the main picture, I have attached the trim to the top but not yet to the bottom.

~ Irene Grimes

Refurbishing my Ikea lamps


Materials: Ikea lamp, spray paint, ikea fabric, masking tape, recycle paper

Description: I bought a pair of these lamps from Ikea about 5 years ago I think, when I first planned to move into our new home.

They were cream in colour, and really nice. Fits the ambiance I planned for my hall. Well, it still does, except that now the creamy porcelain base has gray marks from all the dusts, and some chipped surface from scrubbing the dust off the base. The lamp shade has yellow ageing spots. Ugh!!!


1) Bought a can of spray paint in baby blue. I wanted teal, but the shop only had this one blue colour and I kinda liked this blue, so I bought it.

2) Unscrew the bulbs, separate the shade from the base - basically unscrew whatever that can be removed or separated.

3) I use masking tape and lots of recycled paper to cover the wire and the metal & plastic parts (those that is there to hold the bulbs and the shades. The idea is to cover parts where you don't want paint on.

Because the base of the lamp has holes in them, I taped paper inside the base so that the paint won't go in (it is hollow there and you can get to it from the bottom). There's a place for a bulb there too!

4) Then, this is the fun part. Spray two coats of paint on the base. I left it overnight to make sure it is truly dry (I'm just like that).

5) Then, for the shade - fun and sticky. This is where I took out my Fabric Mod Podge and some leftover Ikea fabric. I simply measure around the shade, cut out 2 pieces of fabric (because they are leftovers, I don't have just one piece that fits around). Brush mod podge on the shade and glue the fabric on. I made sure that the fabric on the outside is slightly wider (about 1.5cm both sides) than the shade, so that I can turn it over and glue them to the insides of the shades

That's really about it.

See more of the refurbished lamp.

~ Grace

�PPLAR� headboard hack


Materials: �PPLAR�

Description: Materials: Ikea �PPLAR� wall panel

Description: I looked and looked for a simple headboard for my queen size metal bed frame (the typical kind with four casters and holes for attaching a headboard and footboard), but couldn't find a suitable one anywhere. After finding the Ikea Hackers website, I decided that I'd be creative and "hack"� myself a headboard. My requirements were these:
- It had to be lightweight and easily moveable (I rent and I like to move my furniture around).
- It had to be affordable (I set myself a budget of no more than 99 dollars).
- It had to be around 62-63 inches wide (to properly fit the width of the queen bed frame).
- I didn't want to spend hours painting, sanding, or drilling.

After I searched a bit, I found Ikea's �PPLAR� wall panel fit the bill (Width: 31 1/2"; Height: 62 1/4"; acacia wood). I bought two of these for $39.99 plus tax.


Step 1: Take the panels out of the boxes. Each comes in two parts: an upper panel and a base. They attach with 4 included pegs.


Step 2: Decide on the height of your headboard. You could use just the bases for an extreme minimalist look. That was a little bit low food my box spring and mattress, so I decided I wanted the headboard a bit higher. I could have just put the panels together and cut the legs down to the right height, but I didn't want to ruin the panel in case I was dissatisfied with the project. Instead, I decided to overlap and attach the top and bottom portions to each other using the predrilled holes. To make it even sturdier, I bought 8 small L-brackets and attached two on the front and two and back of each panel.


Step 3: Attach the panels to each other. I chose to attach the panels together with hinges, making it easier to fold and move the headboard in the future. [Note: in the picture, it shows a hinge at the top, but it should be placed lower so the panels can fold. I'm not too worried about it right now.]


I could have bolted the headboard to the bed, but it sits up against the wall with no problems, so I left it as is. Alternatively, I could use double-sided tape to secure it to the wall. You'll notice in the photos that I stuck Ikea's protective felt pads on the back of the headboard to avoid scratching the wall.

Step 4: Enjoy your new headboard! This is really a lightweight, sturdy, and attractive headboard. It matches my other wood furniture and is exactly what I wanted. I wish I'd thought of it sooner!

~ Matt, Phoenix, AZ

Thursday 28 June 2012

Budget King-sized headboard with luggage storage


Materials: 
2 - 39" Vika Amon table tops (black-brown)
1 - 74" Lack wall shelf with hidden hardware (black-brown
4 - metal "patching" brackets
1 to 3 - 8" X 10" L-shaped wall brackets
2 - 1.5" X 1.5" wood posts
1 - 1" X 4" board

Assorted Screws:
lathe screws
wood screws
screws with drywall anchors

Tools:
Drill with drill bits and screwdriver bits
level
hammer
saw

Description: This hack was inspired by post "headboard fit for a King-sized bed."


1. Lay the two table-tops face down and align them side-by-side, creating a 78" long table-top.


2. Use the metal patching brackets to fasten the two table-tops together. Space the brackets over the lower 4/5 of the seam. Use the lathe screws to connect the brackets to the table-tops.
3. Center the hardware for the Lack Shelf on the seam along the top edge of the back of the table-top. The lower screw-holes will be above the hollow- cardboard filled center of the table-tops so use drywall anchor screws for those fastenings. Some of the holes will be on the solid outer border of the table-top and wood screws will work there.


4. Place the Lack shelf on its hardware and secure in place with the provided screws.
5. Cut the two 1.5" X 1.5" posts to the length necessary to achieve the desired height. I needed a 50" high headboard, so my posts were about 26" long.
6. Cut the 1" X 4" to a length that is about 12" longer than the posts.
7. Aligning the bottom of the posts with the bottom of the 1" X 4" board and centering the posts on the 1" X 4" board, fasten together using wood screws or deck screws. This will create a t-shaped leg to support most of the headboard's weight.


8. Fasten the legs to the headboard. Anchor screws will be needed for some of the fastening and wood screws will be need for the rest of the fastening.
9. Install the L-brackets on the wall to support the the Lack shelf and the rest of the headboard's weight.


10. Place headboard and attach to wall-bracket.

~ Chelsea, Oklahoma City, OK

Desk with Meters


Materials: BESTA, FRAMSTA, NUMERAR

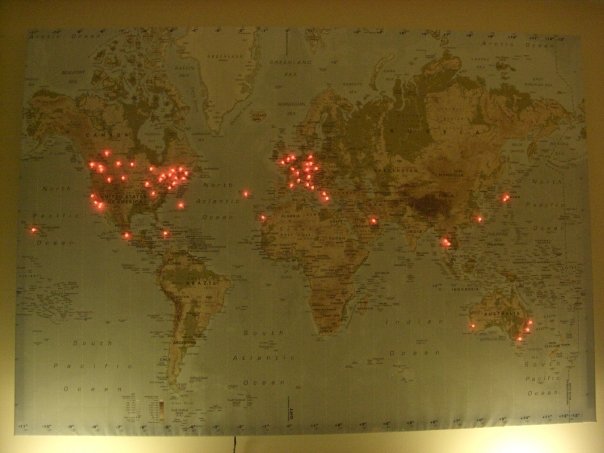
Description: I designed this desk to get all my computer equipment and cables up off the floor, behind cabinet doors, and leave my work surface completely clear. A major part of this project was also incorporating the analog meters which show my computer's status.

The desk is built mostly from modified IKEA parts (see the end for a complete parts list). There are wall-mounted cabinets in two depths. The lower center cabinets are cut to allow my monitors to be wall-mounted; the upper row holds my backup hard drives, video game consoles, speaker controller, UPS, printer, and other devices. In the right-hand lower cabinet, all the cables and interlinks between all the devices come together, fastened to a grid of garden mesh to keep them neat. In the left-hand cabinet (behind the meters) are device docks and chargers. The top cabinets are ventilated by small fans which turn on when the temperature rises, so that I can keep the doors closed.


The work surface itself is an eight-foot-long countertop on adjustable legs, which I stiffened by adding steel angles along the back edge. My Mac Pro is hung from the underside of the desk so that nothing is on the floor. The work surface can be pulled away from the wall or even moved into the center of the room (but the computer has to be unplugged first). Using a countertop gives a much more durable work surface than most laminate desks.

Below the wall cabinets are programmable LED strips behind glass panels, which show a moving stream of colored light (blurred to white in the image above). The lights' speed indicates the current CPU load of my computer. There are four INREDA spotlights mounted to the cabinet above to provide additional illumination on the desk surface.

The array of meters show the four cores of my CPU (top row), RAM usage (bottom left), and network send and receive (bottom right). The large meter on the desk shows overall CPU load.


Parts list and notes:

Wall cabinets

2 x BESTA Frame - 47.25W x 25.25H x 15.75D
2 x BESTA Frame - 47.25W x 25.25H x 7.875D
8 x BESTA Suspension Rail

First I hung the suspension rails on the wall. They clip together to produce one long rail, but I tried to attach each rail at least once to a stud. I used the biggest lag screws I could reasonably fit, because there's a lot of weight in the cabinets, and I had no way to discover the condition of the studs inside the wall.

1 x 3'-0" 2 x 10 lumber
2 x Rosewill RMS-MF2720 Monitor Mount

Then I mounted the monitors and cut the bottom cabinets: I mounted the monitors to a 2 x 10 which I fastened directly to the wall, and then cut a hole in the back of the cabinets to fit around that. I also cut down the sides of the bottom cabinets where they come together, so that the side panel fit behind the monitors.

2 x BESTA VARA Black-Brown Door (23 x 25)
4 x BESTA TOMBO Glass Door (23 x 25)
2 x rolls of frosted window film from Home Depot

The glass doors are clear glass (IKEA no longer makes BESTA system frosted glass doors with metal frames) so I applied frosted window film to the inside of the doors. This requires some patience if you've never done it before.

1 x Metal grid and mounting hardware (from Home Depot)
4 x J hooks (from Home Depot)
2 x Cabcool 1201-2 Fan Kit (from Amazon)

I did a few last modifications to the cabinets on the ground before I hung them. I mounted a small section of 2" garden mesh in the back of the right-hand cabinet to clip cables to, and I installed the cooling fans in the right two compartments of the top row, where my game consoles, backup hard drives, and power supplies would generate heat. I also drilled 2" diameter holes between all the compartments so that I could run cables inside. (All this cutting works best if you do it before the cabinets are put together.) Once they were up, I attached hooks to the bottom of the cabinets behind where the glass would go, so I could run cables there without them dangling down under the desk. (E.g., see the cord going down to the outlet in the pictures.)

2 x FRAMSTA Basic Unit
2x FRAMSTA Glass Gray Panels (2 pack)

Once the cabinets were up, I attached the glass panels upside-down to the bottom of the cabinets. This is a bit tricky but works fine once everything is together.

Desk

1 x NUMERAR Countertop 96.875"
4 x VIKA KAJ Adjustable Leg 4
1 x 72" x 1.5" in. Zinc-Plated Steel Slotted Angle (from Home Depot)
1 x MacCuff Pro from Sonnet

I used a countertop because it is much more durable and much bigger than any desk top IKEA sells. I turned the counter upside-down and attached everything to it on the ground. The steel angles are quite invisible when everything is put together, because they are turned up behind the desk. I put felt pads on them (as you use under furniture) to stop them scratching against the glass panels.


INREDA LED spotlights
After I finished, I discovered that while the LED strips provided plenty of light to see or type by, they were insufficient for tasks like drawing or soldering. I installed four adjustable LED spotlights on the underside of the upper cabinets.

See more of the desk with meters.

~ Matthew Fickett

Lack TV Bench how it should be


Materials: Lack TV Bench and Lack Wall Shelf

Description: I bought the following:
- 1 Lack TV Bench (149 cm)
- 1 Lack Wall Shelf (110)
- 6 GodMorgon legs.

I just put the bottom together as is. Then I just put the Legs between the bottom and top bench. On top of that I placed the Wall Shelf. To support it, I sawed the supporting side brackets of the original Lack into two parts. The legs were just attached to the bottom with a strong tape. The same for the upper shelf. That's it. It holds whatever components you want. Even big receivers.

~ Per-A. Rusten, Oslo

Wednesday 27 June 2012

Baby Hack Attack


Materials: Rast Table & Commodes, Sniglar Change Table, Latt Kids Table, Eivor Leva Fabric, Bygel Rails & Containers, Satta, Oskar, Panna, etc...

Description: With 4 (yes four!) Ikeas in Berlin we can't help but poke through the As-is section(s) on a regular basis and pick-up a bargain or three. *even if the As-is turns up nothing we always manage to find a deal in another area, especially since discovering the awesomeness that is Ikea Hackers - Your wondrous collection of creativity inspired us to hack these beauties for our little munchkin!

For more info, photos, how-to's & Ikea product links click here.

~ S., Berlin

Lantern Hanger


Materials: EKBY H�LL Konsol, svart

Description: Instead of using it for a shelf, we used it in our balcony to hang a lantern.

~ Kaan B�r, Malm�, Sweden

Window flower pots (box)


Materials: EKBY TRYGGVE, EKBY VALTER

Description: Nice alternative to traditional window boxes. This is a Ekby shelf that I trimmed to fit the length of my window, cut three equal holes using a jig saw and inserted three planted terra cotta pots.

I used brackets purchased a another store, but the Valter brackets would work just a well. The construction includes a furring strip 1"x3" attached at a 90 degree angle to the shelf. It's through this furring strip that I attached it to my house using 5, 3.5" exterior screws. The brackets provide additional support but are not actually 'attached' to the house. The pots can be changed out with the seasons and won't rot like traditional wooden window boxes.

~ Heather, Boston

Tuesday 26 June 2012

Besta Expedit computer desk


Photo: IKEA.com
Materials: Besta, Expedit Desk, Malm Chest

Description: I was looking for a simple way to re-use an Expedit Desk and to hide the computer monitor, keyboard and mouse.

The solution was to use a Malm Chest as one of the "legs" of the desk, and a Besta Shelf Unit with sliding doors.

Simple but it works!


~ N Miguel Rodriguesm Portugal

25% A/V Storage 75% Malm


Materials: MALM 4-drawer chest, white

Description: Malm unit converted into 25% Audio/Video storage, 75% Malm drawer storage.

First, we setup the Malm unit as the directions state. We did not assemble the 4th drawer and instead left the top space open. We visited the Ikea as-is section and purchased a $1.99 as-is piece of white, laminated wood. We cut this to the width of the inside of the Malm unit.

We purchased corner braces, long hinge, magnetic strike, and white, laminate chain at our local hardware store. First, we mounted the corner braces to the inside wall both (L) and (R) side.


Next, we cut the white laminated board to size and mounted it to the angle braces. We cut 2, 6 x 6 squares out of the rear board to fit the cords of the A/V equipment.

Finally, we used the extended hinge to secure the front of the 4th drawer to the laminated white board. This created a hinged access door. Finally, we added the chain to give the door support and the magnetic striker to keep the door closed when we don't need it open for access. Enjoy :)

~ Rob Reese II, New York, NY

LEGO Dioder Lamp


Materials: Dioder LED light

Description: This is a hanging lamp containing the Dioder light system inside it. My aim was to make a hanging lamp out of LEGO pieces that I can control just like a normal lamp. As I am not an electrician, I did not wanted to cut off the cables of the lamp but to do it the most easiest way possible.

What I used:
Approx. 500 LEGO bricks
An orange textile power chord
A power plug


So my solution was developed like this:

STEP 1 - The Lamp itself
As we are talking about LEGO, you can design your lamp just the way you would like to. I wanted a lamp that fits on my eating table, so mine is of the size of 87x8x13.5cm

The only thing you should be aware of: more LEGO bricks mean more weight. Consider this as the hanging hook or whatever system you will use can handle this weight.
Enough talk: construct your lamp. If you are about to use the Dioder system that I used, please plan enough space for the long power cable and the plug. In my solution, I made a basement exactly at the middle of the lamp inside it, so that I could simple put the cable and plug on there.

STEP 2 - The ceiling power cable
TURN YOUR POWER OFF! And check twice that it really is turned off! Attach the textile chord to the power cables from the ceiling. Insert a hook in the ceiling right where you want your lamp to hang above and pull the textile cable through this hook. For safety reasons i make a knot here, just in case that the lamp might fall of for whatever reason.

Now attach the plug to the chord and insert the Dioder in it to see if it works. Hopefully it won't work, because you have not turned on your power on again! So turn your power on and if you attached it correctly then there should be light.
TURN IT OFF AGAIN - just for safety reasons.

STEP 3 - The plug in the lamp
Now put the Dioder system inside the lamp on the bricks-base you build. In my solution I built some kind of "dome" around the plug so that even these bricks can work as hanging system that does make the plug hang inside the lamp. Depending on your design you certainly will find some way to attach the plug or the chord to the bricks.


At the moment I do not own black LEGO plates, but started collecting them so that I can close the upper part of the lamp with them.

See more of the LEGO Dioder lamp.

~ Carlos Pinto, Hamburg, Germany

Monday 25 June 2012

Numerar standing desk


Materials:
NUMERAR/VIKA BYSKE LEGS

Description: Looking to transition to a standing only setup, I purchased two NUMERAR counter tops (double sided). They were 73 inches wide, with silver trim.


They are extremely HEAVY. Then I purchased 5 BYSKE legs for each .. and Capita brackets with the LACKY top.

~ Eric, Baltimore

Awesome Vintage Hemnes


Materials: Ikea fabric, Hemnes, paint, vintage brass handles, spray glue

Description: Long time ago, I painted my Hemnes. But it looked a bit like a lego-toy, like plastic. I bought a can of spray glue, some Ikea fabric, and I stuck them to the dresser. I think it looks good.

~ Anna, Germany

$30 DIY Tripod Laptop Stand


Materials: BRADA Laptop support, 3"x1" Wood slat, you need around 6 inches for length, 1/2" x 4" Bolt, with 2 washers and 2 nuts, 2x 1/4" x 2" Bolts, with 2 washers and 1 nut per bolt, Super Clamp, Drill, Saw, Drill bits

Description: Photographers will love this. This is a hack to attach a laptop stand to your tripod so you can shoot on the fly. The back of the Brada laptop stand is reinforced with a strip of wooden slat and bolted securely.


The center bolt has to bear the weight of your laptop and probably the only thing stopping your laptop from turning into a pile of broken glass. The bolt is then "Super Clamped" onto the tripod.

See more of the tripod Laptop stand.

~ Jerrit Pruyn - Fstoppers, NYC

Vintage Spontan memo board


Materials: SPONTAN memo board, old sheet music book, wallpaper paste, brush

Description: First you tear out six pages of the music book to cover your memo board. Use old sheet music, because it has yellowed paper and gives your memo board a vintage look. Glue the pages one by one on the board and don't forget to cover the sides as well. It doesn't have to be perfect, it's just to make sure all the gray is gone.


After that, you tear up the remaining pages into small pieces. Use different sizes and shapes.


After you've produced a big pile of pieces it's time to glue. Use as many pieces as you like and continue until you're satisfied. After you've glued a piece on the board use the brush to add another glue layer on top.

When you're satisfied you add another glue layer on top. That way there won't be any loose spots and you make sure every pieces stays where it belongs. Now it's time to let it dry.

When the glue has dried your music notes memo board is finished!

See more of the DIY Vintage memo board.

~ Imkeliene, Netherlands