Showing posts with label PS Cabinet. Show all posts

Saturday, 25 May 2013

PS to Sideboard


Materials: Ikea PS, Wood, Stones, Saw, Colour

Description: I had this hand made sideboard made by my self out of wood - you usually use in a kitchen, and Ytong-Stones, my GF had this old PS-board from Ikea.

This hack is kind of a joint venture.
I saw off the pins of the PS board and made it fit.


Of course I did some wiring. And painting and I integrated all my little gadgets in there.
I think just a clean and homemade look.

~ Phil von Kretsche, Hamburg, Germany

Friday, 12 October 2012

Give your Ikea PS Cabinet a Gunmetal finish. Inspired By Restoration Hardware.


Materials: Ikea PS CabinChalkboard paint, silver craft paint in "Gunmetal", Annie Sloan Soft Dark Wax, Mineral Spirits, paint sponge, 2 paint brushe, 220 grit sand paper, rags and "Better Than Cheesecloth" Buffing towels.

Description: Do you have a piece of Ikea furniture that you've kept in storage because it just didn't "fit in" with the style of your home? I'll explain how I took an Ikea PS locker cabinet and gave it a good ol' Ikea hack by painting on an aged steel finish. This was inspired by the Restoration Hardware Vintage Industrial Steel Cabinet.

Sand your piece of furniture with the 220 grit sandpaper till it's no longer shiny, even when you wipe off the dust.

Wipe it down with vinegar. These two steps will prep your furniture for the paint and give your paint something to grab onto.

Lightly dip your brush into the chalkboard paint and dab most of it off onto a paper plate.


"Dry brush" the paint lightly on your surface.

As soon as you finish your first section, wipe off the paint with a dry rag.

The sanded surface will catch most of the chalkboard paint.

Ignore the faux rivets in this picture. I was trying to decide if I liked them.

It looks messy, but it gets better. The good thing about this paint project is that it doesn't have to look perfect.

After you have done this with the entire cabinet, you want to apply the silver craft paint.

Put a couple of tablespoons of the Gunmetal silver craft paint onto a paper plate and add about a half teaspoon of water to thin it out.

Take your paint sponge and dip it into the silver paint and dab most of it off onto your paper plate. This is also a "dry brushing" technique.

Lightly streak this paint onto the surface in one direction. If you get too much on, just wipe it off in one direction.

I let this dry for about 2 hours.

Now it's time for the magic to begin!

Take a scoop of the dark wax and put it on a paper plate. Blend in a small amount of mineral spirits, just enough to thin it out.

Take one of your paint brushes and dip just the tip of the bristles into the wax and dab most of it off onto the paper plate.

Lightly drag the brush in one direction over your surface. This will prevent you from getting too much wax on at one time.

Now, take your clean paint brush and buff in the wax in a circular motion. Don't let your wax dry too long before you get to the buffing step.

Let this dry for 5 minutes.

Take your "Better Than Cheesecloth" Buffing towel (I bought mine at the same store that I bought my Annie Sloan Dark Soft Wax) and start buffing out the wax so the surface has a nice, thin layer.

The dark wax is what really gives the piece a nice patina. It also protects all of your hard work.

I let the first coat of wax dry about 30 minutes before applying the second coat of wax.

For the rivets, you will need upholstery tacks, hot glue, super glue, and 2 pair of pliers.

To see more pictures and picture of each step, then visit this link.

~ Tricia

Saturday, 7 July 2012

Double height IKEA PS cabinet


Materials: Two IKEA PS, metal saw, drill, screwdriver and four metal screws.

Description: Using two cabinets, take one cabinet apart as seen on picture. Doing this will make the rest of the work easier.

Gently knock the side upwards using something soft. The coating/enamel is fragile! Draw a line where you want to place the cut. Use a hand metal saw. I started with a electrical grinder but the hand saw was much better. Make the cut as close to the base as possible. When you bring the side down again it will cover the cut and the more precise you are - the tighter fit.

You can use the plastic ends of the cut of legs if you like a tiny space between the two cabinets.


Make a hole for cables. Could have been done nicer but I used Gaffa tape - I LOVE GAFFA TAPE - can be used for anything and everything...

Put most of the cabinet together but leave the top of. Place on top of the other (not modified) cabinet. Make sure there is a good fit. In each corner there is an already existing hole. Mark the location with a pencil. Drill a hole with metal drill and screw cabinet onto the top of the bottom cabinet.

Put cabinet together and you have a double height cabinet. Can be done with red/white and i geuss you can stack them higher than i did...

The hidden compartment between the two cabinets will work perfectly to hide electrical cables in.

~ Calle Winskog, Sweden in Australia

Sunday, 16 October 2011

Custom shoe rack and bench


Materials:
Ikea PS, wooden board or Ikea countertop, wood batten, angle steel, screws, hardoil, table saw, belt sander, power drill

Description: My brother and I recently moved into a new apartment and needed a place to store our shoes. We also wanted a bench to sit on when putting our shoes on/off. One of the walls in the entrance area wasn't straight but bends a bit and couldn't be used for anything else like a regular cabinet or storage rack. Inspired by a hack posted in the bathroom section using Ikea PS we wanted to do something similar. Unfortunately the steel version was no longer available in Germany so we went with the white version of Ikea PS. Here is what we did:


First we set up the cabinet in the regular fashion but without the wheels. We then dug out an old piece of blockboard from our dads basement and used the table saw to saw it in the correct shape matching the curve of our designated wall. Afterwards we sanded down the old coating and smothed the edges. For added durability we then threw on a layer of hardoil.

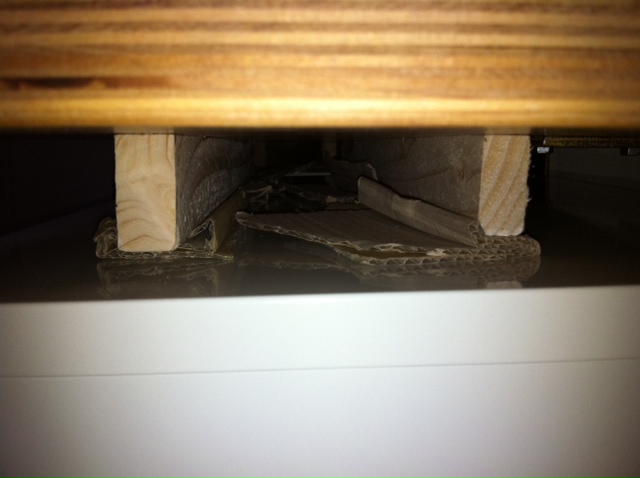
Next we chose a height for the bench and mounted the board onto the walls using four large angle steels. Since it's a sheetrock wall we figured the angles wouldn't provide enough support in order to hold 2-3 persons sitting on the bench at the same time and screwed a couple of battens underneath the board so that they sit on the Ikea PS cabinet in the front part of the bench and take some weight of the angle steels. Using a bit of force and one person slightly pushing up against the the board we then pushed the cabinets underneath the blockboard. Since the battens didn't sit on the cabinet perfectly in all areas we used a few pieces of cardboard to even out the differences.

We are now very happy with this aesthetically pleasing, functional and relatively cheap (overall around $100 bucks) solution which can hold up to twelve pairs of shoes at the same time.

Thanks to our dad, our grandfather, Lorenz and Ikea hackers for being awesome and making this happen.

~ Lorenz and Julian, Berlin, Germany

Monday, 7 June 2010

PS HTPC


Materials: IKEA PS Cabinet (without wheels), PC parts and wires.

Description: This is maybe more a proof of concept than a full blown, elegant hack.

We have a Home Theatre PC, used for recording tv shows, watching movies, storing our music, photos and so on. After we became parents, I had to find a way to keep my son's curious little hands away from the delicate hardware.

I was unable to find a cabinet that both looked good and could accommodate the rather large computer, so after a while I thought of simply taking the parts out of the computer case and reassembling them inside a PS cabinet we had standing around.

There is plenty of space for the parts and wiring inside the PS, and there is already a hole in the bottom for running power/antenna/network/HDMI/USB cables back and forth. The vents are perfect for 140mm fans.

The PS is pretty much made for this, and the operation is pretty straight forward, if you know your way around the inside of a computer.

If I had to do it over today, I would cut a hole in either the rear or the bottom of the PS cabinet, and move one of the fans there as an intake to increase air flow. I drilled screw holes for the two fans, but you could probably super glue them on for a nicer finish.

~ Soren, Denmark