Wednesday, 24 October 2012

Hacker help: Expedit doors/frames on a budget?

Photo: IKEA.com

Materials: Expedit 4x2, GLADSAX frames

Description: any ideas/suggestion?

Me + boyfriend decided to apply doors to our Expedit (being too messy at the moment).
I was thinking if anyone has used GLADSAX frames as doors and in case if he/she can help us with the hack.

GLADSAX sizes seem to fit quite well if applied to the EXPEDIT but I would love to be sure in order to avoid wasting money + a quite new bookcase...

Any suggestion/tip would be really appreciated...

~ chiara, Milan, Italy

Another twinned Hemnes shoe cabinet


Materials: Hemnes shoe cabinet

Description: Do you remember the inspiring ScrapHacker's idea "HEMNES gets a double topping"?

I've decided to use it in my hallway, following the anonymous comment of removing one of the "sides" in the middle. Actually, instead of that, I've decided to keep both inner "sides" and I've removed one of the inner columns, as you can see in this photo.


First of all I did 4 mirrored holes in the rear side of the central column. Remember, the front side can not have any hole. Then I did the 10 holes in the opposite lateral side of the column. So, I mounted the Hemnes as a single shoe cabinet with 3 legs. Finally, because I don't consider myself a handyman and I don't even have a handsaw, I've kept untouched the two original top plates. Therefore the two twinned top plates have a bit of an overhang on each side of the cabinet as you can see in this final photo.

Last tip: according your firefighters, keep in mind you have to respect the hallways' standard measures.

So, ScrapHacker, you may be glad of being inspiring to someone else: me!

I hope your hack can still be helpful to more people.

~ Paulo, Canada

Whiteboard desk


Materials: PERSONLIG kitchen tabletop & Vika Moliden stands

Description: As I'??m an avid fan of '??post your desk topics/workspace?� forum threads', I thought it might be nice to share the IKEA hack in use in my own workspace.

Last year I decided to refurbish my home office, to create a space that enables me to do my work in the most optimum way and of course that is pleasing to the eye. The first thing that came to mind was a whiteboard, I bought a really big one. However its 5 to 6 feet away from my desk and I realized I didn't use it enough due to '??distance'.

Sitting behind the desk while on the phone or just using my computer I found myself scribbling on pieces of paper instead of getting out of my chair and walk over to the whiteboard. So I needed a small whiteboard I could grab and use at my desk, sounds like a plan however I like minimalistic designs where as much 'clutter' is removed as possible. I needed to come up with something different, enter the whiteboard desk!


Instead of buying a mini whiteboard that needs to be stored when not using it I decided to visit my local IKEA shop and see what'??s available. While looking at tables, I noticed that the IKEA kitchen department sells customized tabletops (PERSONLIG). Each dimension is possible in almost every shape. I decided to order a 7 feet by 3 feet high-gloss white tabletop (1104) with a 1.49"?� stainless steel edge.

I chose to order the 1.49 inch thick tabletop as I need to have a desktop that is sturdy enough to hold the weight of a 27" iMac and a 30"?� TFT screen. The stainless steel edge fits snug around the desk and covers each side; it doesn't stick out and is not noticeable when typing. It looks fantastic however the downside is the price, it was more expensive than the table top itself. The alternative is a laminate cover that looks like it will be worn out easily, while spending most of my time behind my desk I thought it was worth the investment of buying the real thing.

The high-gloss finish acts as the whiteboard surface and works like a charm with any whiteboard markers. I left notes on my desk for multiple days and could be removed without leaving a trace.

The tabletop rest on two IKEA Vika Moliden stands, due to the cast of the shadow its very difficult to notice that the color of the stands do not exactly match the color as the stainless steel edge.

The whiteboard desk is just an awesome piece of furniture, when on the phone I can take notes on my desk while immediately drawing diagrams next to it. It saves a lot of trees, saves a lot of time scrambling for a piece of paper and a pen and decreases clutter on the desk. The only thing you need to do when building a whiteboard desk is to banish all permanent markers in your office. :)

See more of the whiteboard desk.

~ Frank Denneman, Amsterdam

Tuesday, 23 October 2012

Longed-for Home Office


Photo: IKEA.com
Materials: Hemnes with add on unit plus one more add on unit

Description: Coveting a desk I'd found on-line five years ago and not being able to find it in my area nor probably afford it, the following was my solution.

We bought the Hemnes desk with add-on unit plus one more add-on unit to get the height I was looking for.

Hubby built the desk per the Ikea directions until he got to the add-on unit. We flipped it upside down -- so the drawers were at the top and left the middle trim piece off of the top (which is really now the bottom). He did add the trim pieces on each of the columns and then placed a shelf over the opening -- kind of makes hidden storage that no one knows about but us!
Inspiration photo

Hubby cut down the top piece to a little wider than the add-on unit and then stacked the second add-on unit on top.

I figure I got my longed-for office space for about a third of the price.

~ Carla

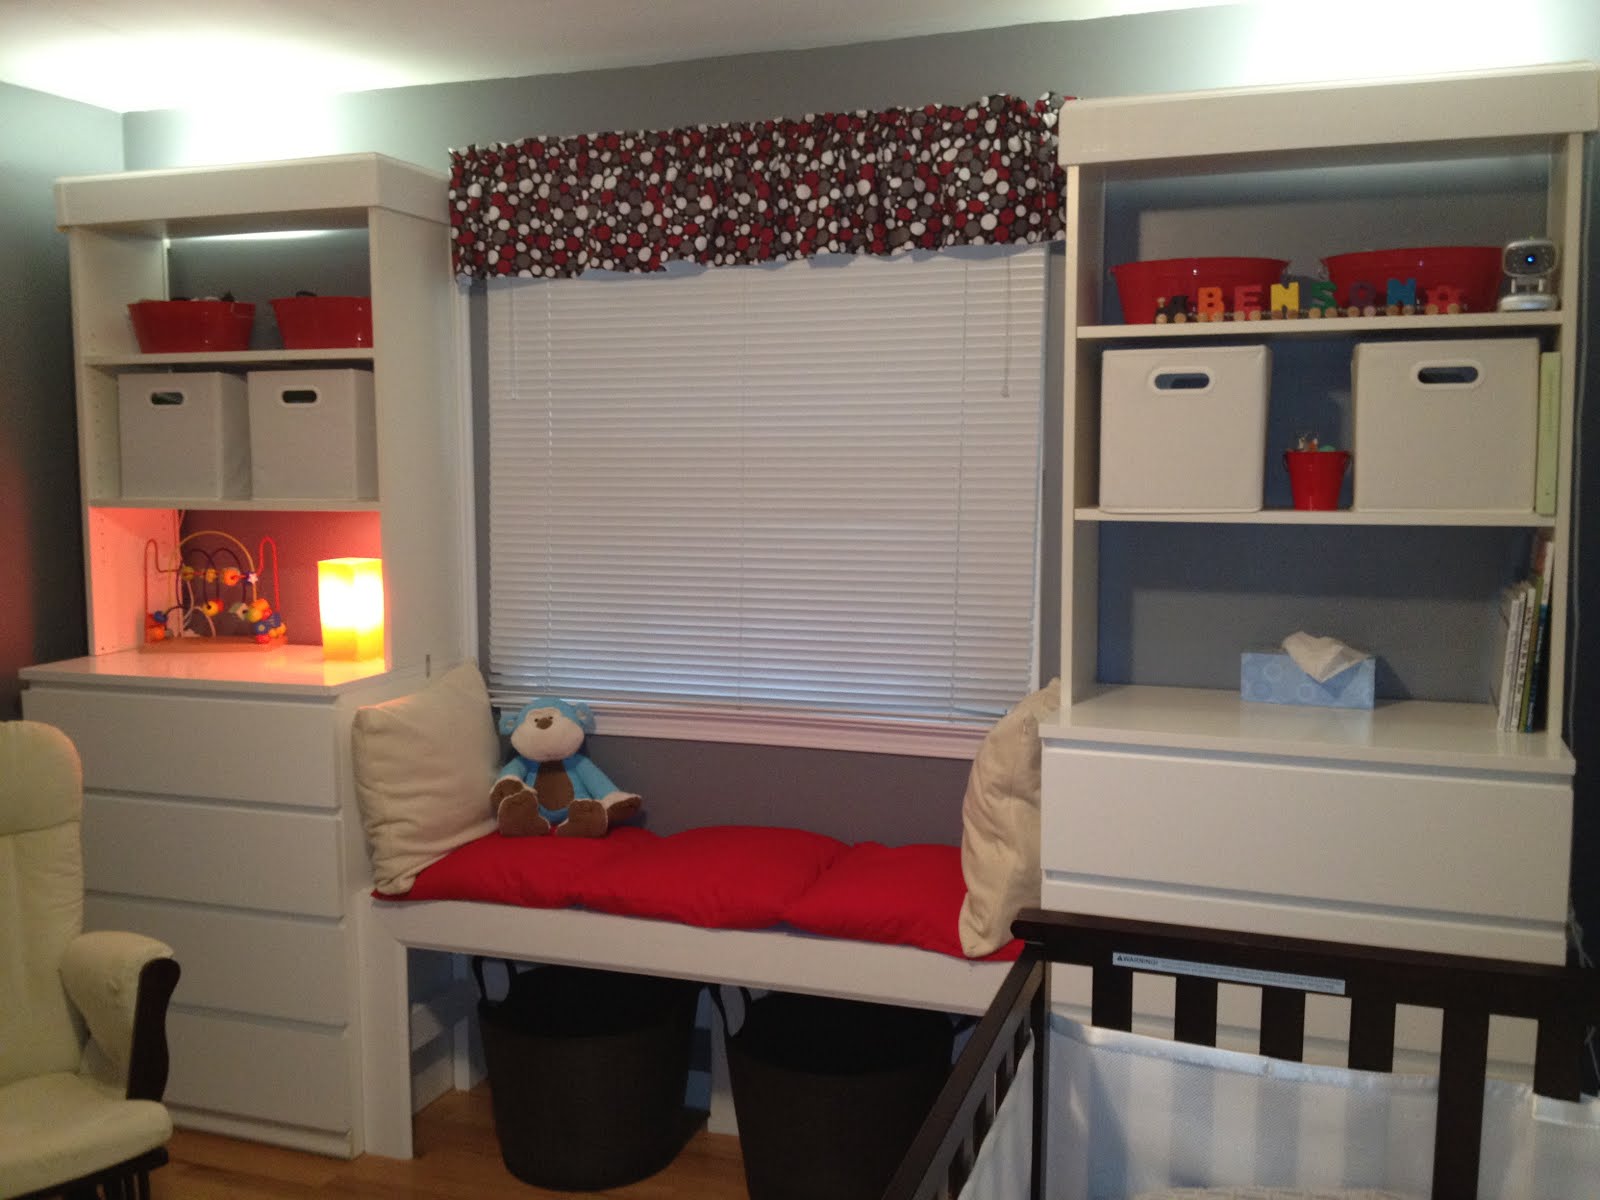
Mock Built Ins with Malm and Billy


Materials: Malm 4- Drawer, Billy Bookcase

Description: We noticed that the Billy Bookcase and the Malm dressers have the same width. We decided to stack one on top of the other to create a built-in-look while giving us some additional storage. We built each of the two dressers as instructed. For the Billy shelves, we build them as instructed, except we did not attach the top or the back.

Next, we turned the Billy upside down and placed it on top of the Malm. Thus, the base of the Billy is actually the at the top of our shelves. This allowed the top of the Malm to be accessible without being obstructed by the bottom shelf and base of the Billy. The Billy and the Malm are held together by brackets. We also attached each piece to the wall. We then trimmed the base of the billy (now the top of our shelves) with crown molding to give it a built-in look. We also trimmed the bottom of the Malms.


We build the bench ourselves, as Ikea didn'??t have one to meet our specifications.

We then used the Granat cushions on the bench. We also hid an integrated lighting strip (I can'??t recall which one) behind the crown molding on the top of each Billy.

~ Rachel, Detroit, MI

Monday, 22 October 2012

Hacker help: Too many chairs

Photo: IKEA.com

Photo: IKEA.com
Materials: Skoghall dining set

Description: Hi, I moved in together with my boyfriend about a year ago. It's a tiny apartment and we have too much stuff.

Our biggest problem at the moment is that before we moved in, we had already bought PS chairs from the 2011 collection (saga). We didn't have a table yet, until one day we were in IKEA and they were selling out the Skoghall dining set for just �50, which is cheaper than most tables, so we bought it.

Photo: IKEA.com
Now we have a table for 4, but there are 8 chairs in our apartment. The Skoghall chairs are just standing in the living room, taking up space where I want to put an extra couch.

We never use those chairs. However I don't want to get rid of them.

So basically my question is this: are there any ways I can use these chairs as not-chairs? Like for storage or...

Important: They are not stackable!


Also IKEA's own idea of hanging them up and using them as shelves is not something we can do as we can't hang anything on the walls in the living room and the bedroom is too small for that.

~ Katinka W, Belgium

Mirrored Mosaic Coffee Table


Materials: Don't know Ikea model name, mirror, glass, putty knife, grout, mastic

Description: I bought an Ikea coffee table at a garage sale for $25. At the same time, I purchased some glass 'seconds' for $1/ pound. These were free-form, poured glass with small copper wire hangers embedded. I snipped off any external wire. There was also some broken mirror in the $1/pound bin so I bought that too. I ended up spending about $20 more on thick mirror from craigslist.

I gave the tabletop a light sand. Before starting a project with clear glass, you may want to paint the surface the same color as the mastic you will use. As it dries, it will shrink and the surface color below will be seen. I don�??t mind this cracked effect, but others might. Next, I laid out the poured glass pieces. I didn't quite have enough to go all the way to the edge so I recessed them about an inch. I also included flattened glass balls from craft shops (for vases and such) where each blob met.


Once I liked the layout, I used premixed mastic (aka thinset mortar) to put them in place. You simply 'butter' the back of each piece and squish it flat to the table. Remove any that squeezes out before it hardens. Next I started with the mirror. I used a simple glass scorer from a craft store and a pair of glass cutters to break and cut the mirror. I held the pieces in a cardboard box as I cut so any little chips would be caught by the box. Safety glasses are recommended. One piece at a time, like building your own puzzle, and soon it is done.

This project took several days the way I did it, but if you have a regular sized surface and uniform tiles, it can go pretty fast. Also, I was able to pry up and re-position some pieces even after the mastic had dried. Just scrape it off and start again. Before grouting, clean as much visible mastic off the project as possible. A little warm water and a dishtowel work well.

Once everything is down and set it is time for grout. For this project, I used premixed, sanded grout but I wouldn't recommend it. The premix has some kind of additive that makes it kind of tacky and clean up is much harder than with regular grout. Since the poured glass pieces didn't go all the way to the edge, I used my finger to finish the outer edge of grout.

I decided to paint the outer edge of the table top a blue to match the glass, but left the legs the original color.
Ta-dah!


Table: $25
Material: $25
Tools: $17
TOTAL for "??New Table": $67 and a few weeks worth of evenings.

~ Anne Howley, Redmond, Wa