i am sure mark's dog is barking its approval of this dog bowl stand.

mark writes, "i have always heard that it is important to raise the food and water bowls up higher off the ground for dog breeds that are medium to large in size. my wife and i looked around at quite a few places and almost everything we found either looks like it's from a hospital or is entirely too expensive. the most important thing for us is that it had to be inexpensive and look good in our mostly contemporary styled house.
here are all the tools that i needed as well as a description to go with it.
starting piece:

tools:
- power scroll saw. (i bought mine for $20.00 at lowes. it isn't something i use much so i didn't buy an extremely nice one.)
- wood blades for the saw above.
- 18"- 24" level or straight edge.
- measuring tape (unless the above straight edge is a ruler)
- pencil to mark lines for cuts.
- "C" clamps or quick clamps to hold guide in place.
- 5" random orbital palm sander. (i splurged and bought the top of the line Craftsman Professional version because i use a sander quite a bit around the house)
how to:
1. to start with, i measured the top of the stool to make sure that it could hold the dog bowls comfortably. i found that the top was perfect in width, but too deep front to back. i noted the measurement and proceeded to the next step.
2. i then watched the dog eat with the bowls on the ground and estimated a good height to raise the bowls. i noted the measurement and proceeded to the next step.
3. i then took the straight edge and drew lines up the side of the stool on either side of the cut out that was already on the side of the stool. that set the front to back depth of the new stand. those lines transferred to the top surface, and created my cut lines for the top.
4. i then measured the distance, on my saw, between the blade and the outside of the guard that surrounded the blade. this is important because i clamped the straight edge to the stool to help give me straight cuts. if the straight edge was to be clamped directly on the lines drawn above, the saw would cut a certain distance inside of that line creating too small of a product.
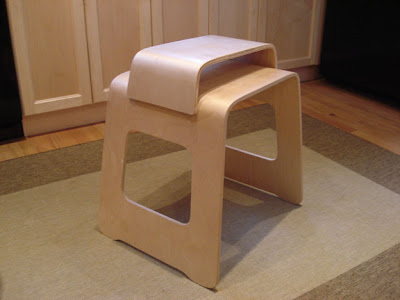 an original benjamin stool with the dog bowl stand cut from it
5. once everything was clamped, i began to cut out the final shape. the clamps and straight edge had to be moved several times to help cut different portions of the product.
6. once it was all cut out, i went around the edges with the palm sander to clean the edges and to help smooth out the corners. i started with 60 grit paper, and eventually went up to 220 grit.
7. after the sanding was finished, i wiped off the entire product with a damp towel to get rid of residual saw dust.
8. the final step was to put rubber feet on the bottom, to help prevent the unit from sliding and damaging our wooden floors.
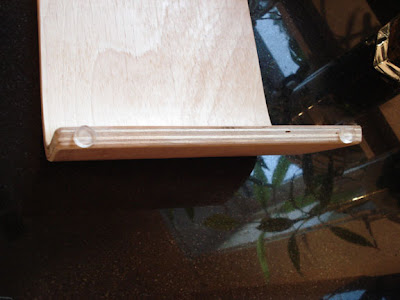

as you can see in the pictures, the dog loves the final result. it only took me about an hour and a half to do, however i had been thinking about how to approach it for a while. also, the bowls are ceramic dinner bowls and are from
target."
***
chloe's version (updated jan 30, 2008)she says, "i wanted to raise my dogs' bowls off the ground, both for their digestion and so that i'd stopped kicking them! and i also really wanted a windowsill for my plants as none of my windows have them, so we put this together.
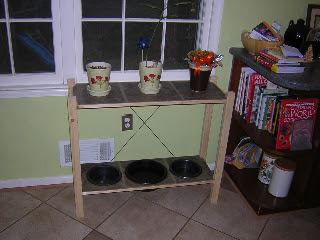
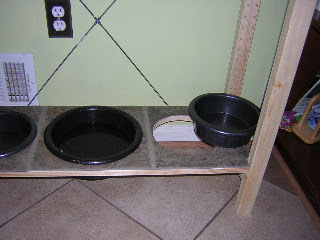
it's just your basic ivar (12" x 49" sides, 33" x 12" shelf) shelving with three holes cut in the bottom shelf, two food, one water bowl. we then stuck vinyl floor tiles (left over from another project) onto the shelves for waterproofing and just because we thought they looked good. we had to cut the shelving unit down to the right height for our windows and sneak in a couple of 'L' brackets at the back for some extra strength. it works really well, the dogs don't chase their bowls around the kitchen any more and i am gradually getting some plants going."
Designer's version (update 1 Jan 2009)Ikea Items Used:
Other Items Used:
1 - 8" stainless steal doggie dish *$5
1 - package adhesive backed
EPDM rubber weather seal *$3 to keep the dish from 'clanking' against the stool (attached under the rim of the dish where it meets the stool)
Hack tools:
1 - empty pizza box
1 - staedtler compass
1 - rotozip with hole zip attachment and wood cutting bit
1 - drill with drill bit
He says, "I have read that it is better for dogs to eat with their heads up instead of down. Seeing as how I have a large breed dog i needed something to bring his food dish up quite a bit. There are lots of products on the market for this but they are all ugly or cost way too much for what they are. So my solution is this $28 (cost of stool, stainless dish, and rubber seal) Ikea Benjamin stool with a hole cut out for the doggie dish. It's stylish, functional, easy to clean, and very simple to make/hack. A quick template, some measuring (always double check), and cutting/sanding and you got yourself a dog dish stand that will fit into any modern or contemporary home!"
Related doggie hacks:
-
Elevated dog bowl feeder-
Tasteful dog crate -
Kitchen bench and dog bed


 i stuck the comics on with PVA glue before assembling the five parts. then i coated the whole stool in PVA before varnishing it with two coats of high gloss and lastly, stuck on little felt


