


a reporter from french tv is looking for ikea
Thursday, 9 November 2006
french tv wants you
was just checking in on jen's and saw this entry which was too juicy to pass up.
a reporter from french tv is looking for ikeafreaks fans. she's doing a story on the big blue and yellow and is looking for anyone who has a home chock-a-block with flatpacked goodies. they'll shoot your home and all the fun stuff. and you'll get to bask in the limelight for a bit. hop over to jen's ohikea for contact details.
a reporter from french tv is looking for ikea

Wednesday, 8 November 2006
a zebra desk
the last one on zieak's list from craftster - a stripey desk. dollparts made this desk a while ago from 3/4" mdf, propped up by what i suspect are ikea vika curry legs and a helmer drawer unit. latex paint and lots of varathane later, out comes this beauty.
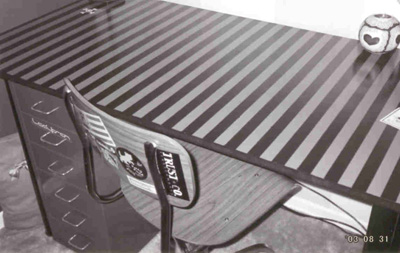 though it's a little dizzying, i love it. link.
check out her handbags too. [dang, they are all sold out!]
 though it's a little dizzying, i love it. link.
check out her handbags too. [dang, they are all sold out!]
Tuesday, 7 November 2006
mini chests with ribbon weave
hustlerose posted this ikea fira mini chests with a unique ribbon weave on craftster. not my style but i like it that it takes a completely different route from other fira hacks i've seen so far. what a creative twist.
"so like a couple years ago i bought the standard wooden boxes from ikea ... and thought it would be more fun to weave ribbons on the front and here is the result:"
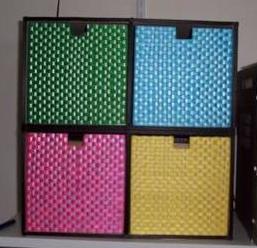 "basically, i glued strips of the colored ribbon on one edge of the box and the white ribbon along the bottom of the box. the colored ribbon was wider so i put the strips right next to each other but the white ribbon was thinner so i spaced them out. then i wove them together and glued them down on the other sides of the box (all the colored ones first, then the white ones and then i went back and re-glued any of the ribbons that came loose or needed to be adjusted). then i glued the black ribbon all the way around, cut of any ribbon that went past the black ribbon and glued black ribbon to the front of it because i didn't really like how the plain wood was showing on the front." link. [thanks, zieak!]
related hacks:
> a touch of class for ikea mini chests
> ikea fira mini chests get hot new looks
> barbie box
"so like a couple years ago i bought the standard wooden boxes from ikea ... and thought it would be more fun to weave ribbons on the front and here is the result:"
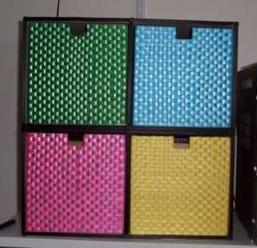 "basically, i glued strips of the colored ribbon on one edge of the box and the white ribbon along the bottom of the box. the colored ribbon was wider so i put the strips right next to each other but the white ribbon was thinner so i spaced them out. then i wove them together and glued them down on the other sides of the box (all the colored ones first, then the white ones and then i went back and re-glued any of the ribbons that came loose or needed to be adjusted). then i glued the black ribbon all the way around, cut of any ribbon that went past the black ribbon and glued black ribbon to the front of it because i didn't really like how the plain wood was showing on the front." link. [thanks, zieak!]
related hacks:
> a touch of class for ikea mini chests
> ikea fira mini chests get hot new looks
> barbie box
Monday, 6 November 2006
barbie box
i'm one of those little girls who never had a barbie in her life. not that i wanted one anyways. back then, i hated everything pink and frilly. i'd rather play with tanks, soldiers, cars and my favourite japanese superhero, ultraman, with his deadly specium ray ... but i digress.
back to barbie, this is for you barbie lovers.

"i bought one of those storage boxes from ikea and decided to decorate it and as my room has no specific style i thought when in doubt use barbie," gemjams posted on craftster, "all i did was paint it all, then i got the pictures i wanted (they came from a barbie book), stuck them down then covered it with varnish, you can use pva glue however it is harder to clean as it goes all sticky. for the front picture i took out the drawers then i just placed the picture on top and cut where the drawers ended. simple as that." link.
related hacks:
> a touch of class for ikea mini chests
> ikea fira mini chests get hot new looks
back to barbie, this is for you barbie lovers.
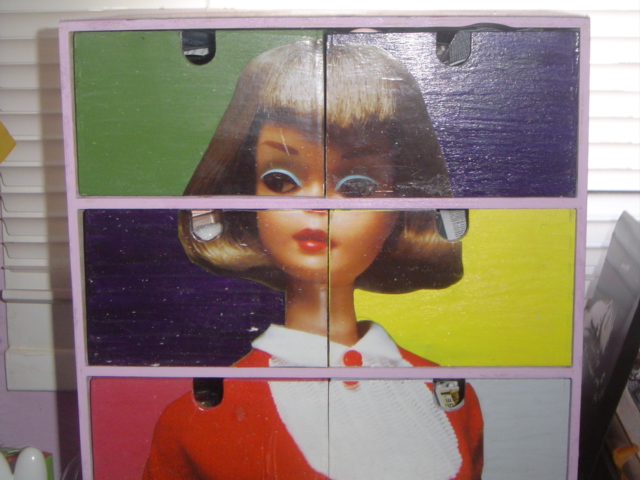
"i bought one of those storage boxes from ikea and decided to decorate it and as my room has no specific style i thought when in doubt use barbie," gemjams posted on craftster, "all i did was paint it all, then i got the pictures i wanted (they came from a barbie book), stuck them down then covered it with varnish, you can use pva glue however it is harder to clean as it goes all sticky. for the front picture i took out the drawers then i just placed the picture on top and cut where the drawers ended. simple as that." link.
related hacks:
> a touch of class for ikea mini chests
> ikea fira mini chests get hot new looks
Friday, 3 November 2006
make mine a mosaic table
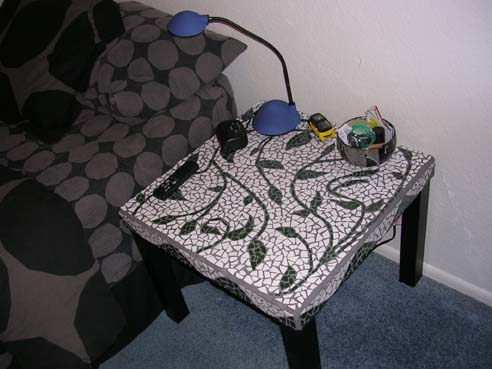
you'll love this one. when i first saw this i almost squealed in delight. such a lovely idea and executed with such painstaking love too. thanks to zieak, who tipped me on this mosaic table by keyoung posted on craftster.
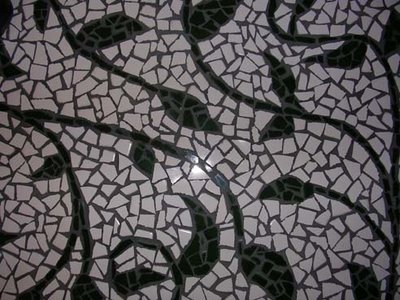
"i just finished mosaicing a cheap ikea end-table (a lack table, i think). i settled on an ikea table after searching thrift shops for months and not finding a suitable table. it's really nice to have non-beveled edges so you can easily mosaic over them. it was a lot of fun, not terribly hard but time consuming, and i already have ideas for at least 4 more tables!
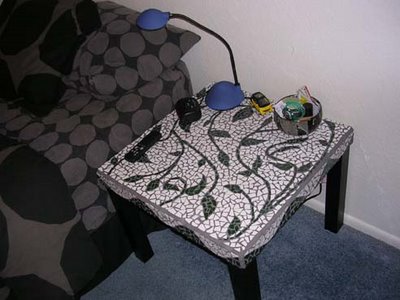
i used homedepot bathroom tiles and a hammer and tile nipper to break them up. i secured the tiles using liquid nails (clear small projects) and finished up with grey non-sanded grout. i'm pretty proud of it, hopefully it'll inspire somebody out there to give mosaicing a shot!"
"i just finished mosaicing a cheap ikea end-table (a lack table, i think). i settled on an ikea table after searching thrift shops for months and not finding a suitable table. it's really nice to have non-beveled edges so you can easily mosaic over them. it was a lot of fun, not terribly hard but time consuming, and i already have ideas for at least 4 more tables!
i used homedepot bathroom tiles and a hammer and tile nipper to break them up. i secured the tiles using liquid nails (clear small projects) and finished up with grey non-sanded grout. i'm pretty proud of it, hopefully it'll inspire somebody out there to give mosaicing a shot!"

close up of mosaic
link.
Thursday, 2 November 2006
how to add your own images to the skugga lamp
as promised, another lamp hack from zieak's list.
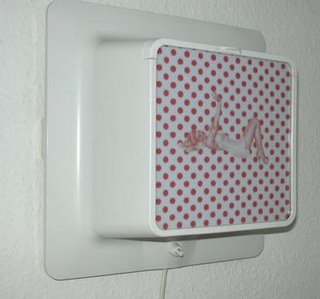
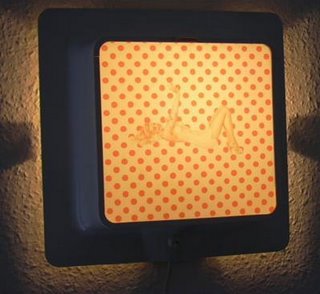
the idea of having changeable images for a lamp has always fascinated me and there has been more than one occasion that i've stared longingly at the ikea skugga lamp. this skugga hack by friederike definitely takes it a notch up and opens up loads of possibilities.
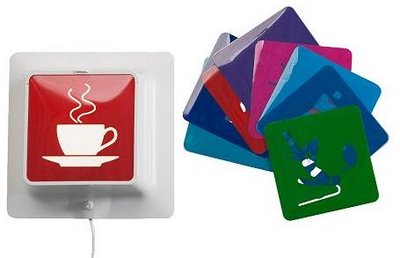
it's also pretty easy to do. just put together the picture you want using software such as photoshop. size it according to the insert that comes along with the skugga and then print it out on an overhead transparency. cut it to size and slot it in as you would the usual skugga inserts.
link.
related hacks:
> drinks umbrella lamp shade
> fabulous nudie postage stamp lamp
the idea of having changeable images for a lamp has always fascinated me and there has been more than one occasion that i've stared longingly at the ikea skugga lamp. this skugga hack by friederike definitely takes it a notch up and opens up loads of possibilities.

the original skugga and inserts that look more like toilet signs
it's also pretty easy to do. just put together the picture you want using software such as photoshop. size it according to the insert that comes along with the skugga and then print it out on an overhead transparency. cut it to size and slot it in as you would the usual skugga inserts.

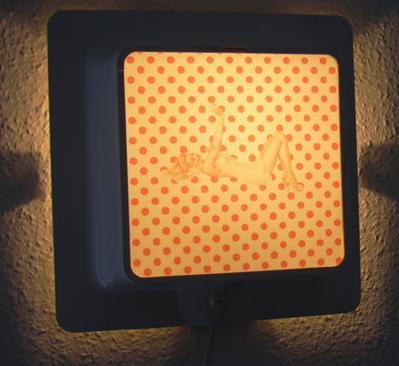
make a statement with your skugga lamp
link.
related hacks:
> drinks umbrella lamp shade
> fabulous nudie postage stamp lamp
Wednesday, 1 November 2006
little umbrellas, big light
another lamp hack from zieak's craftster list. this one's from lil jammer and it makes you wanna order a mai tai.

related hacks:
> nudie postage stamp lamp
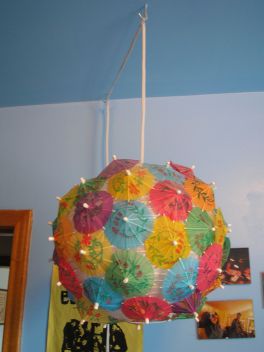
drink umbrella lamp looks great when it's off

there are 2 ways to skin this lamp.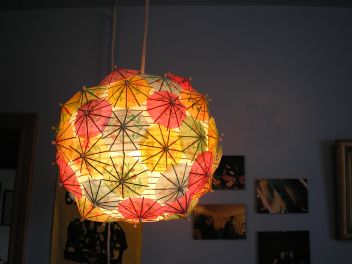
or on!
- lil jammer trimmed about half the stick off the umbrellas, poked them into the ikea paper lantern (i'm guessing it's the ikea regolit) and rolled the sticks in scotch tape from the inside to stop them from falling out.
- a craftster reader suggested applying glue on the underside of the umbrellas, sticking them through and cutting away the stems from inside. use low-heat glue as white glue won't cut it for thin paper and hot glue just burns through.
related hacks:
> nudie postage stamp lamp
Subscribe to:
Posts (Atom)


